Is your FileLinked store growing at an unexpected rate? Are you having trouble keeping up with the download traffic? Then you should use FileLinked with Seedboxco. Seedboxco offers bandwidth of up to 10 Gbit/s and allows you to handle an unlimited amount of download traffic. Of course, Seedboxco is one of the services that offer unparalleled privacy for FileLinked stores with a suite of security services at your disposal.
In the following tutorial, we’re going to share with you how to create your own FileLinked store by using a clear, step-by-step process.
If you follow this method to the tee, you’ll be able to enjoy restriction-free usage with no traffic as well as lightning-fast bandwidth.
Attention: Read before you continue
Governments and ISPs across the world monitor their users online activities. If found streaming or browsing content on your Fire TV Stick, mobile or PC, you could get into serious trouble.
Currently, the following information is visible:
- Your IP:
- Your Country:
- Your City:
- Your ISP:
If this is your real information, you need to use a VPN to protect your identity.
We strongly recommend you to get a good VPN and hide your identity so that your online experience doesn’t take a bad turn.
We use IPVanish which is the fastest and most secure VPN in the industry. It is very easy to install on any device including Amazon Fire TV Stick. Also, it comes with a 30-day money-back guarantee. If you don’t like their service, you can always ask for a refund. IPVanish also runs a limited time offer where you can save 74% on your VPN and they allow you to use one account on unlimited devices.
This is a flash sale that can expire at any time!
It’s ideal for big or rapidly growing FileLinked stores that generate massive amounts of traffic.
This is a fairly easy tutorial on how to use FileLinked with Seedboxco and it should only take about 10 minutes of your time when applied correctly.
Here we go:
The first step is to visit: https://www.seedboxco.net/
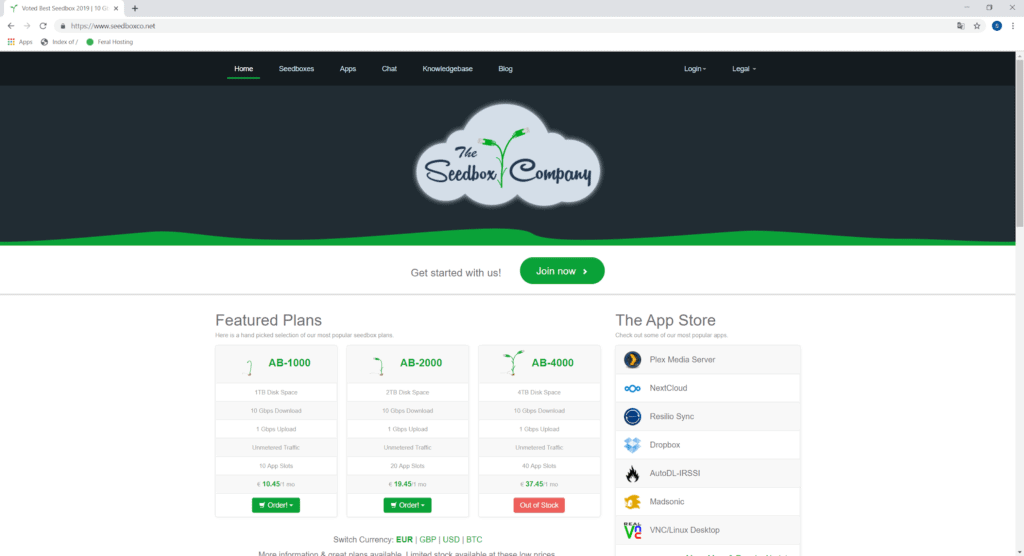
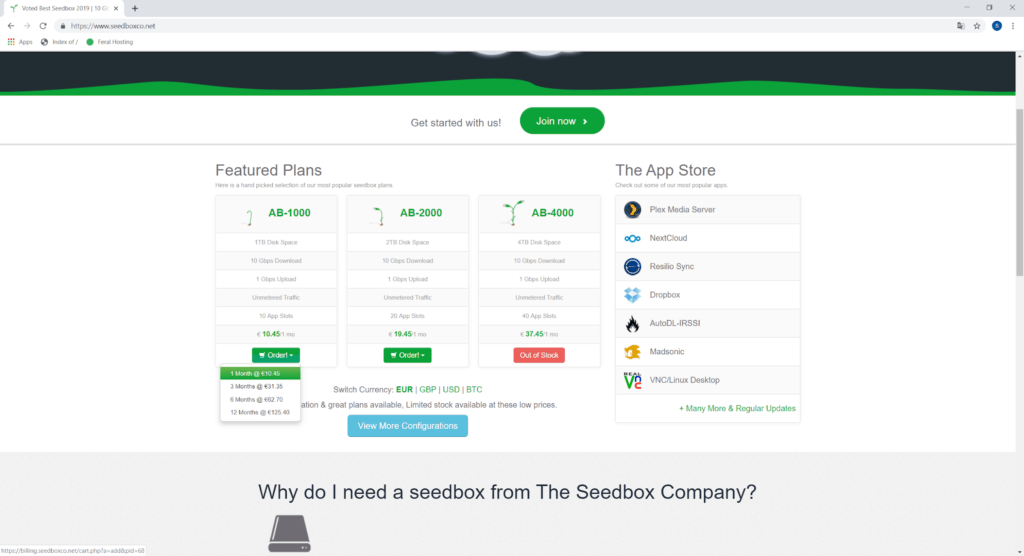
Choose the AB-1000 plan or alternatively any plan you prefer.
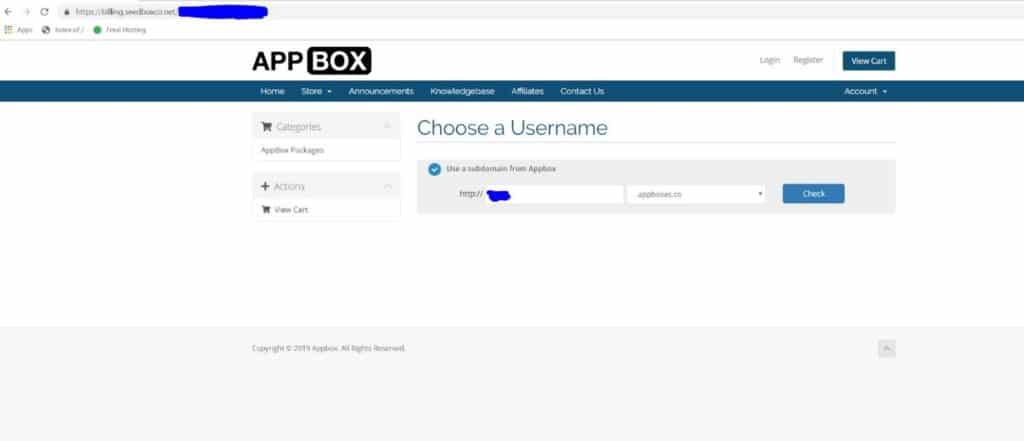
Choose a cryptic moniker instead of using your real name for the appbox.
Click on “Install FTP”
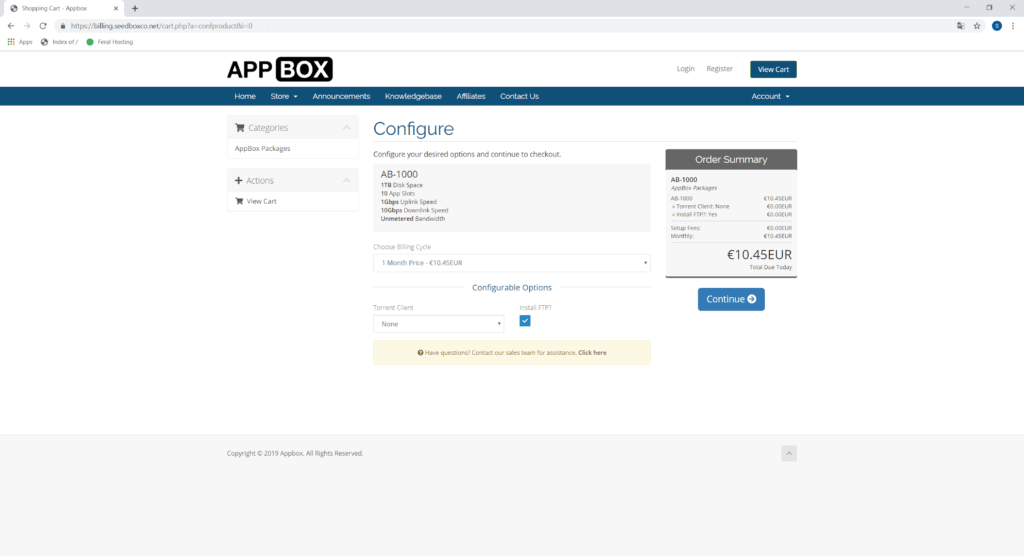
Select “checkout”
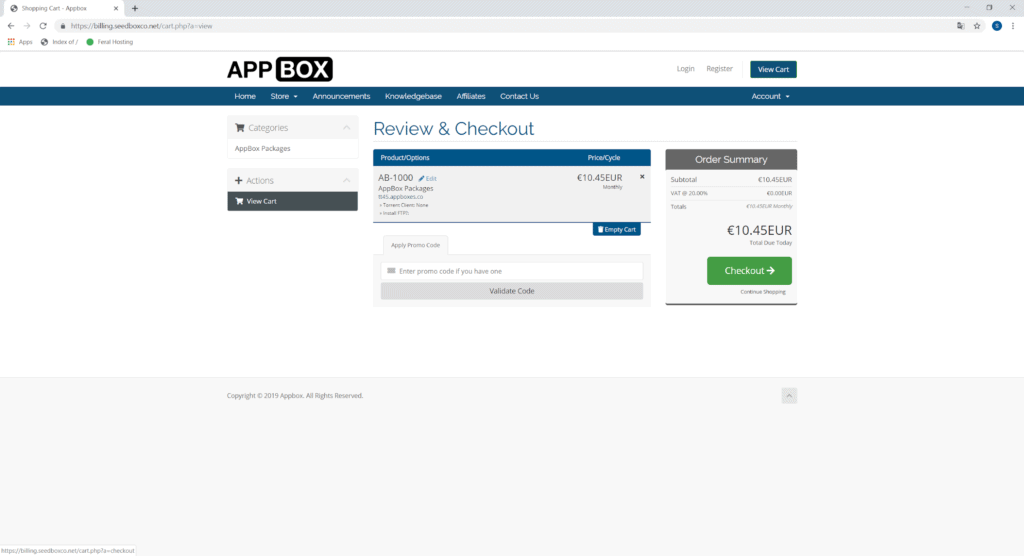
The next step to setting up FileLinked with Seedboxco is to enter your personal credentials. This includes a cryptic moniker of your choosing and a difficult password that’s also easy for you to recall.
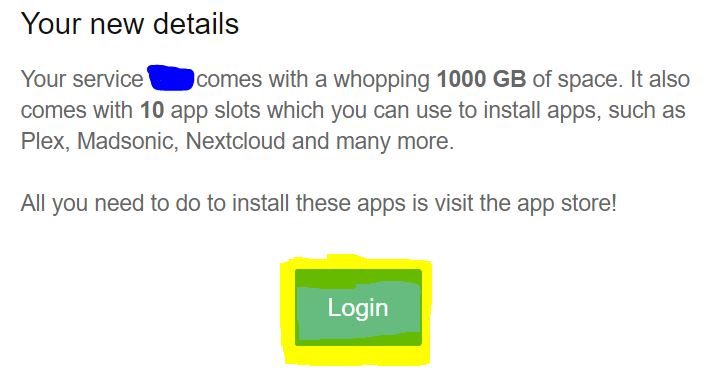
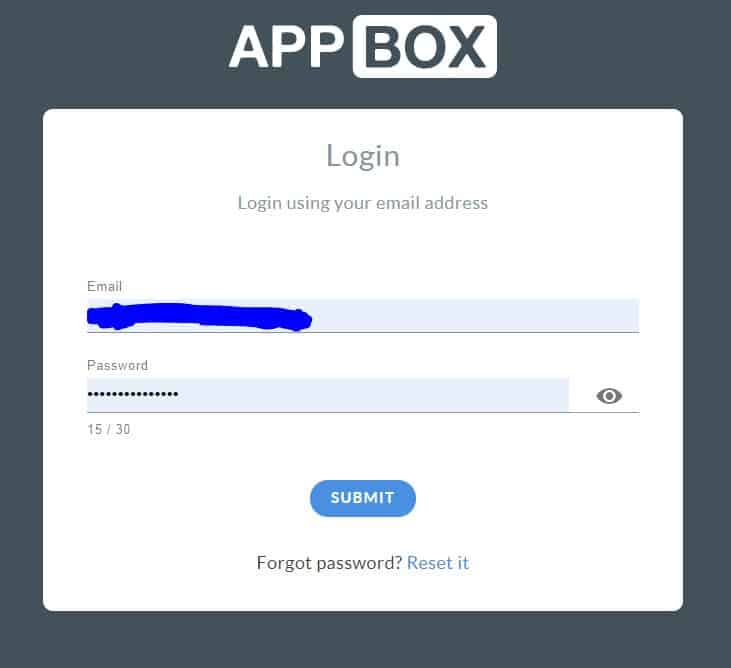
Then, use your preferred payment method to pay at checkout. You should immediately get a confirmation email. Open this email and select the “login” button.
You see the spot highlighted in blue? That’s your appbox subdomain.
The next step to using FileLinked with Seedboxco is to log in using the Appbox credentials you created earlier.
Once successfully logged in, you should see a dashboard that looks like the image below.
It’s important that you save this URL by BOOKMARKING it in your web browser.
From this dashboard, you’ll be able to manage your entire account as well as the included features and apps.
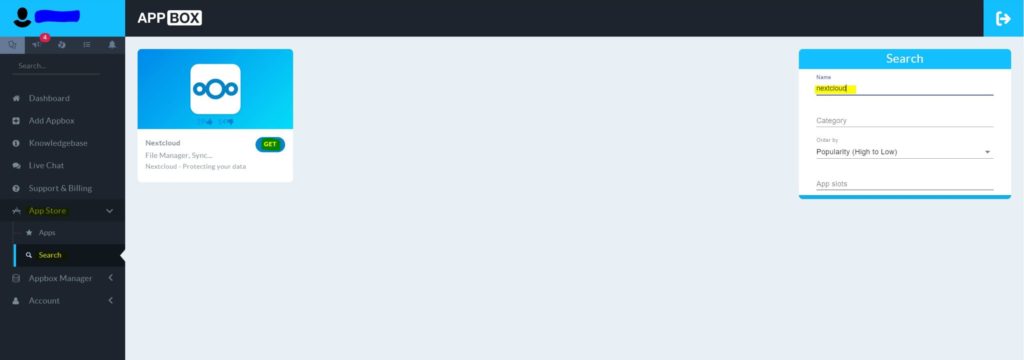
Now that you’re logged in, you’re well on your way to using FileLinked with Seedboxco. The next step is to hit the “app store” button, followed by “search”, then “search for NEXTCLOUD.”
Hit the “GET” button and start setting up your Nextcloud account.
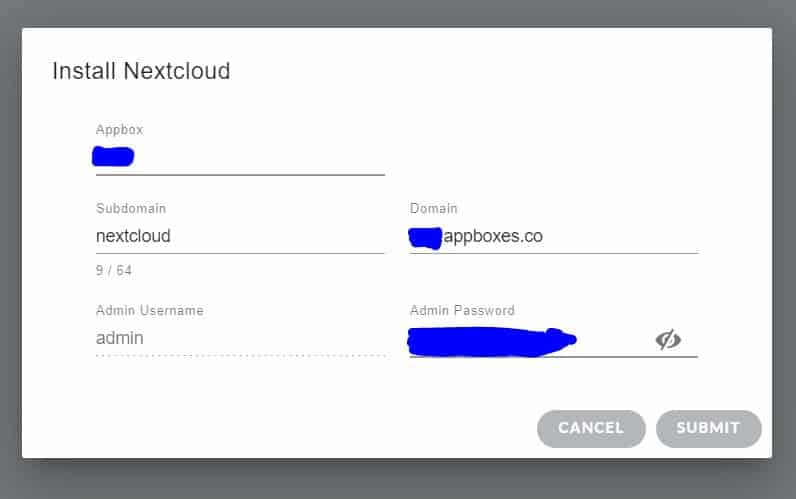
Click on the fields to enter the requested credentials. You might even get accurate suggestions to speed up the process!
- Appbox: Choose the Appbox name contained in your confirmation email.
- Subdomain: Choose any name you like for the subdomain or leave this field blank for now.
- Domain: Choose your Appbox name and enter .appboxes.co at the end.
You’re really closing to completing this process so you can officially start using FileLinked with Seedboxco & Nextcloud.
Be sure to save your credentials (i.e. Admin Username and Password) before you carry on.
Hit the “submit” button to confirm.
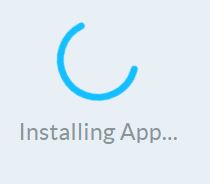
Your screen should look like the image shown below.
Wait for the Nextcloud to finish installing. This might take a while and you’re free to get yourself a cup of coffee or tea while you wait.
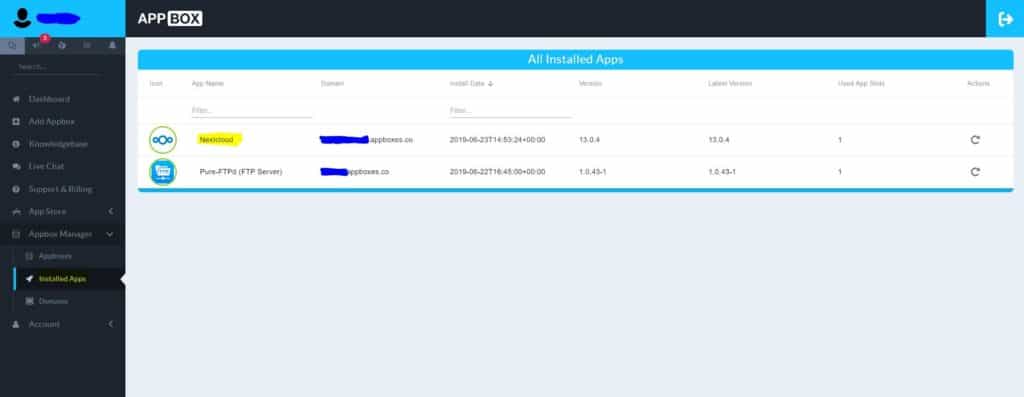
Once you finish installing Nextcloud, go to the dashboard and select an option that says, “Installed Apps.” Then, click on the “Nextcloud” app.
In the following screen that appears, hit “Nextcloud URL.”
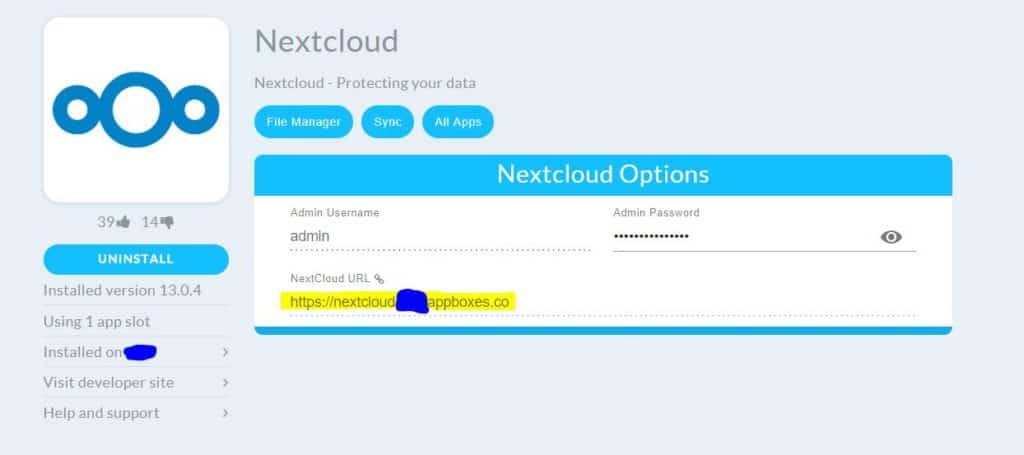
Again, it’s important to bookmark this URL to make it easier for you to log into your Nextcloud account.
Now, use your credentials to log in.
Well done! You’re almost finished with Nextcloud for your FileLinked store.
At this point, you should see a screen that looks like this:
Hit the “+” button.
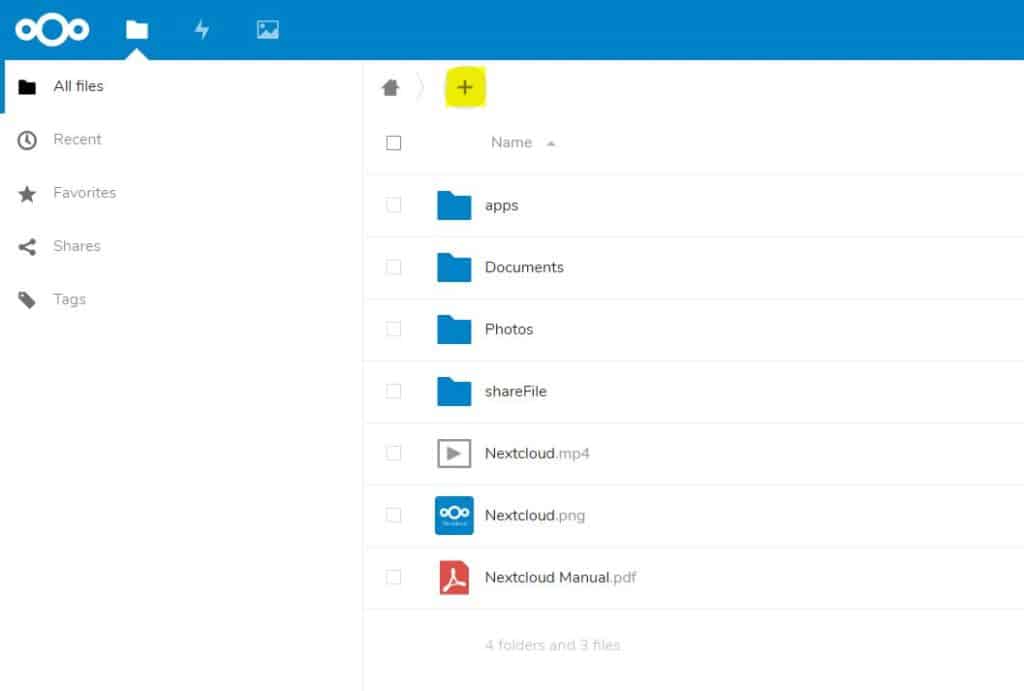
To keep things nicely organized, start creating special folders for specific types of files.
For instance, you can create a folder called “apps” for your apps.
After creating a folder, double click on it.
Upload the first file. As you can see, we’re using Kodi as our example.
Hit the “+” button again and select the “upload file” option. Pick any file in your Nextcloud dashboard you’d like to share on your FileLinked store.
Once you’re done, select the “share icon” button.
The next step of using FileLinked with Nextcloud is to select the tiny “+” button. This will enable you to share the chosen file.

Cut and paste the link by clicking on “Copy Link Icon”.
Make sure to paste the link directly to your webs browser and then add “download” at the end as follows:

Once you’ve augmented the link, paste it onto your browser one more time to see if it works.
If the file starts downloading, it means you’ve done it! You’re now officially using FileLinked with Nextcloud on the Seedboxco host. A great investment that won’t cause you any more problems.
If you want to upload more files, simply go to the upper left corner of your screen and click on the “+” sign again and do the same with sharing.
Rinse and repeat this process to get your FileLinked store filled with files and operating optimally.
Did you find this tutorial helpful? Let us know in the comments section below! We love hearing from you!