In this article, we will show you how to setup Kodi Fusion installer for Kodi Addons. We’re going to show you a technique which is particularly versatile and works for all Kodi enabled devices such as Android smartphones and tablets, Windows PC devices, Fire TV and FireStick devices from Amazon.
If you’re reading this, then you’re aware of the fact that Kodi is a great media player but you can only experience its true potential if you use the right addons. Luckily, users have numerous addons to choose from depending on their needs. Most people go for the video addons but there are other maintenance and utility addons that can make your life easier as a Kodi user. However, it’s important to choose the right addon for your needs and this can be difficult in the beginning.
How to Make the Right Choice
How do I install Fusion on Kodi Firestick? When we search for addons, we tend to look at individual options because it’s the fastest way for you to find what you’re looking for. But you can use other methods such as installing Kodi Fusion setup. This gives you on-demand access to many Kodi addons and repositories. The Kodi Fusion addons went through a brief shutdown period last year and since then they have come back stronger than before.
The Fusion Installer for Kodi 15 now serves as a link between unofficial Kodi addons and Kodi’s factory version. It’s important for anyone that wants to install Kodi addons and tools.
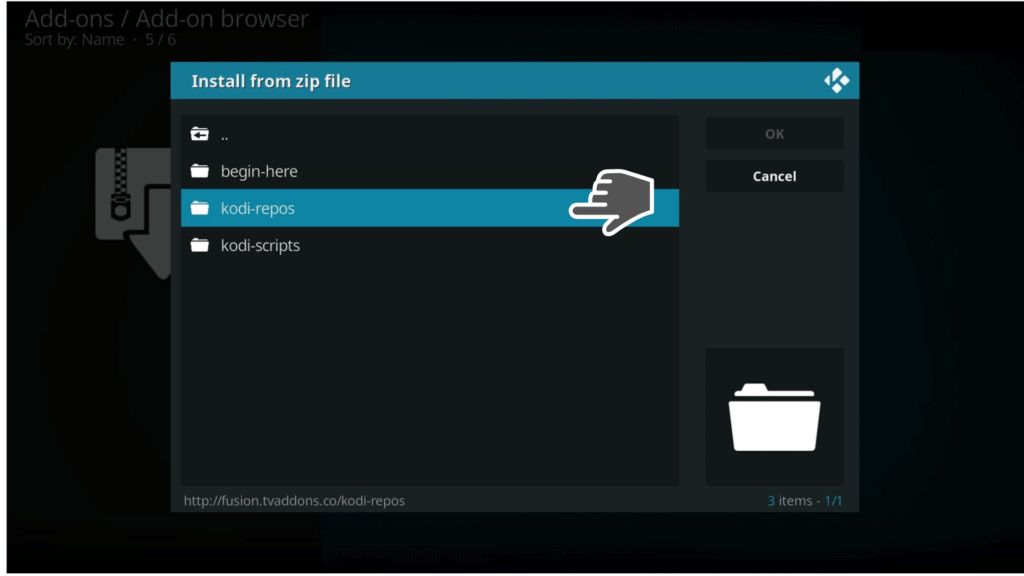
Most of the great Kodi addon repositories are available from the Fusion Installer and it follows the structure outlined below:
- Begin-here
- Kodi-repos
- Kodi-scripts
Attention: Read before you continue
Governments and ISPs across the world monitor their users online activities. If found streaming or browsing content on your Fire TV Stick, mobile or PC, you could get into serious trouble.
Currently, the following information is visible:
- Your IP:
- Your Country:
- Your City:
- Your ISP:
If this is your real information, you need to use a VPN to protect your identity.
We strongly recommend you to get a good VPN and hide your identity so that your online experience doesn’t take a bad turn.
We use IPVanish which is the fastest and most secure VPN in the industry. It is very easy to install on any device including Amazon Fire TV Stick. Also, it comes with a 30-day money-back guarantee. If you don’t like their service, you can always ask for a refund. IPVanish also runs a limited time offer where you can save 74% on your VPN and they allow you to use one account on unlimited devices.
This is a flash sale that can expire at any time!
Let’s jump directly into the guide and add Fusion to Kodi!
But, before we continue, you must install Kodi 18 Leia (Check here the latest version of Kodi) or Kodi 17.6 Krypton in order to proceed with this step-by-step guide.
How to install Fusion on Kodi in easy steps
Here’s a Kodi Fusion tutorial so you can learn how to setup Fusion on Kodi:
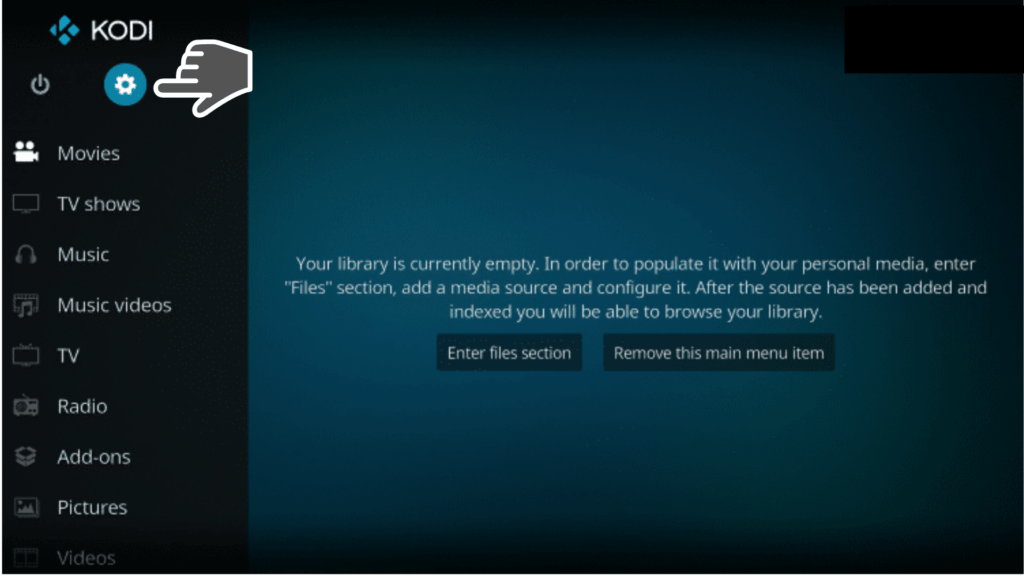
1. Launch Kodi on your Firestick.
2. Click the Settings icon.
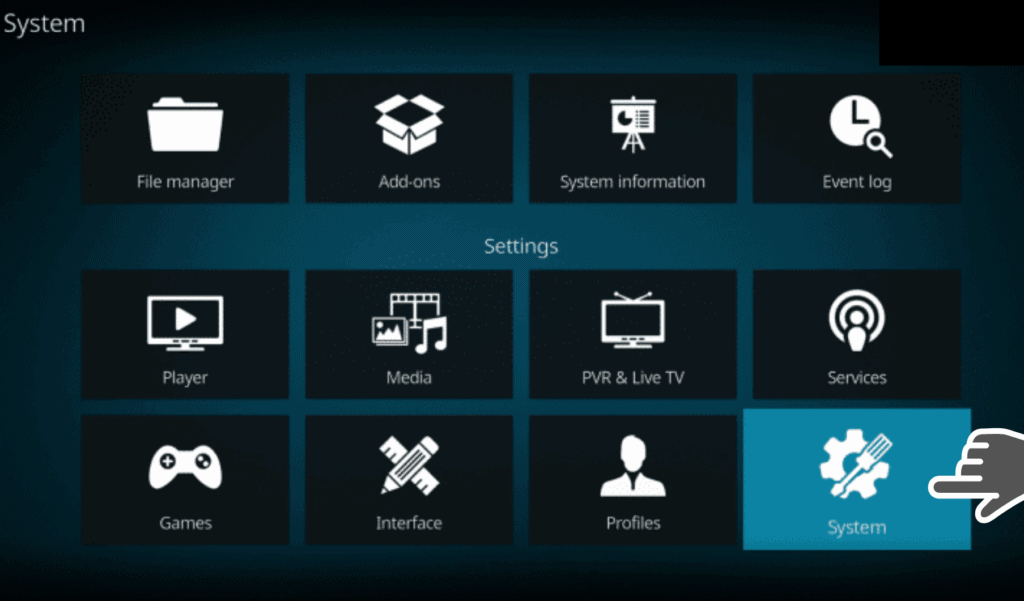
3. Go for System settings.
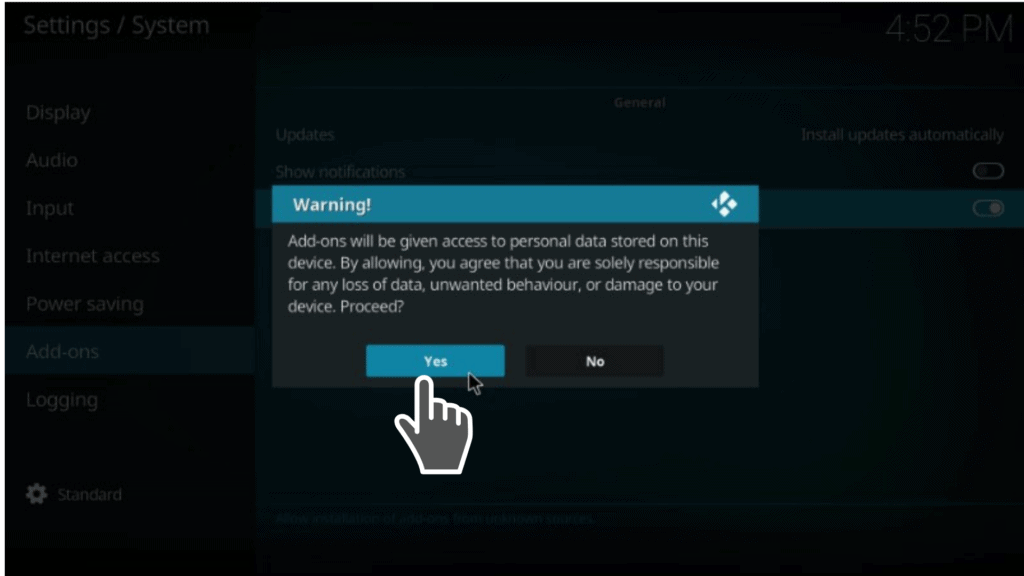
4. Choose “Add-ons” and turn on Unknown sources. Make sure it’s enabled.
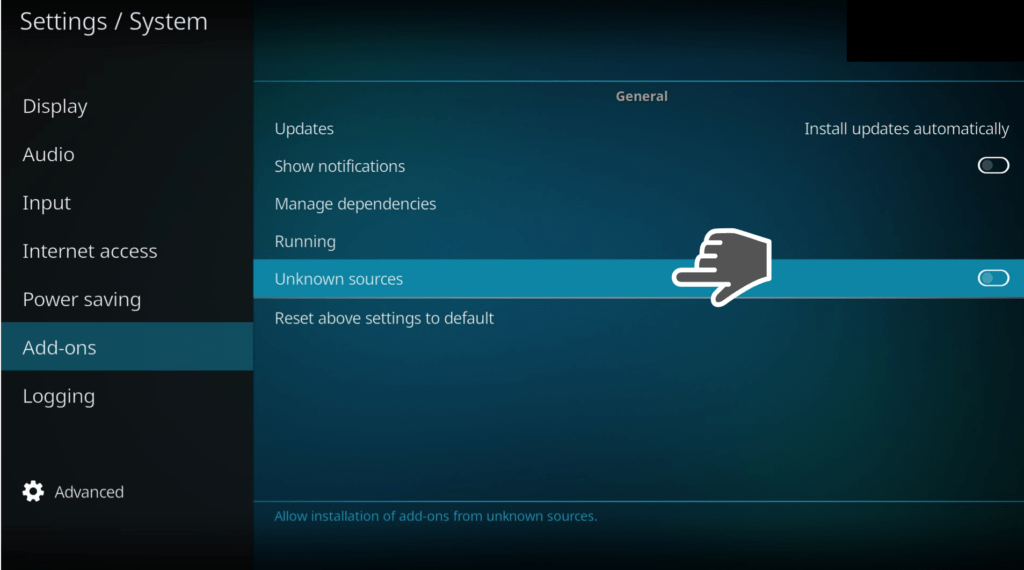
5. A warning message appears, ignore it and click Yes to proceed.
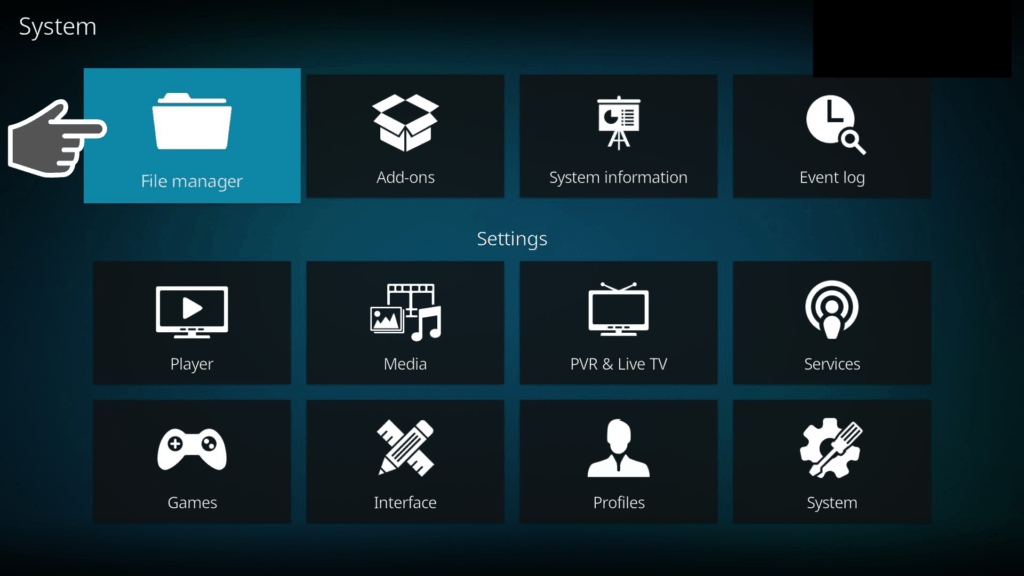
6. Tap the back button on your remote controller to go back to previous screen.
7. Click the File manager.
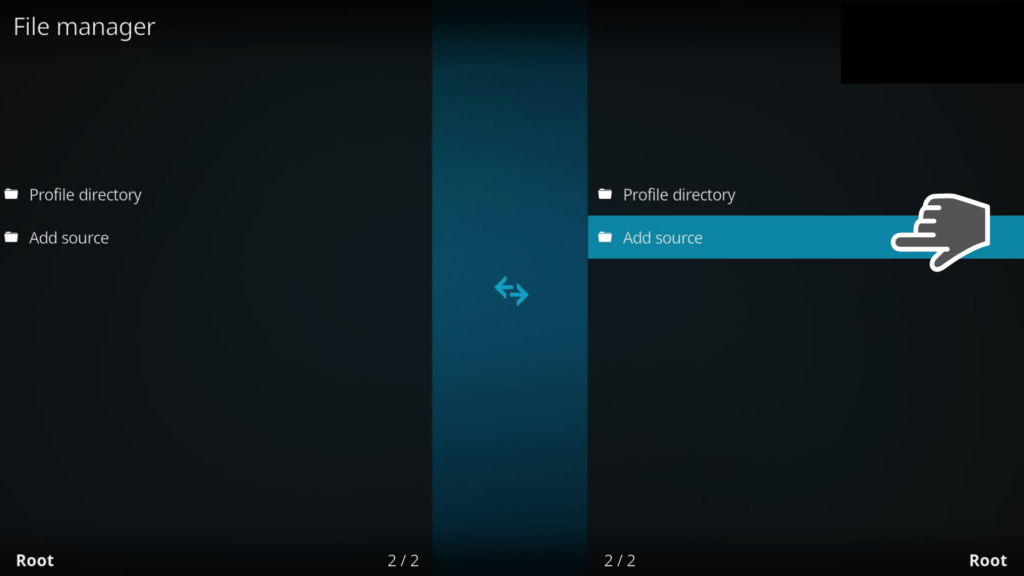
8. Choose Add Fusion installer source.
9. Click on <None> to add the file source.
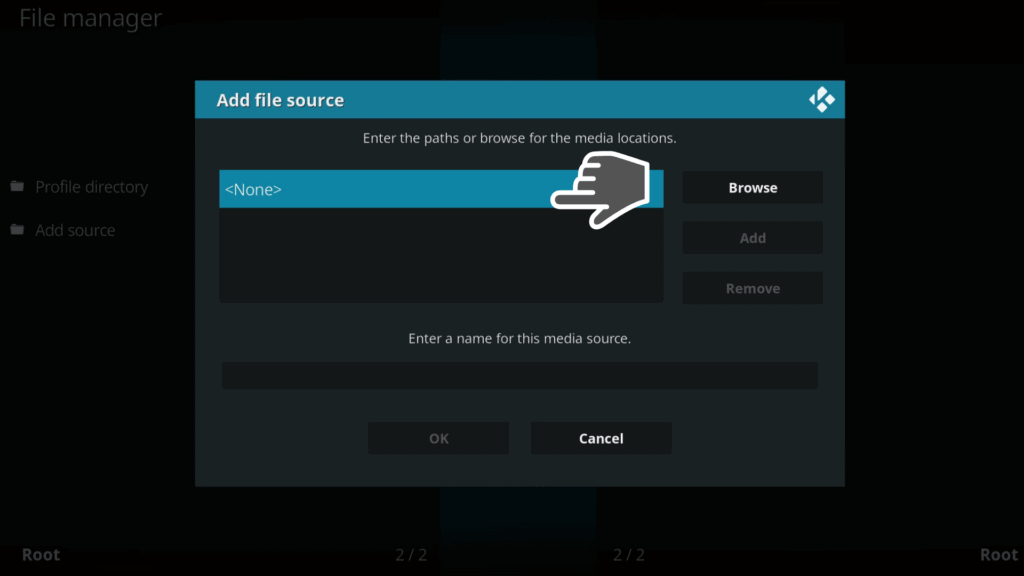
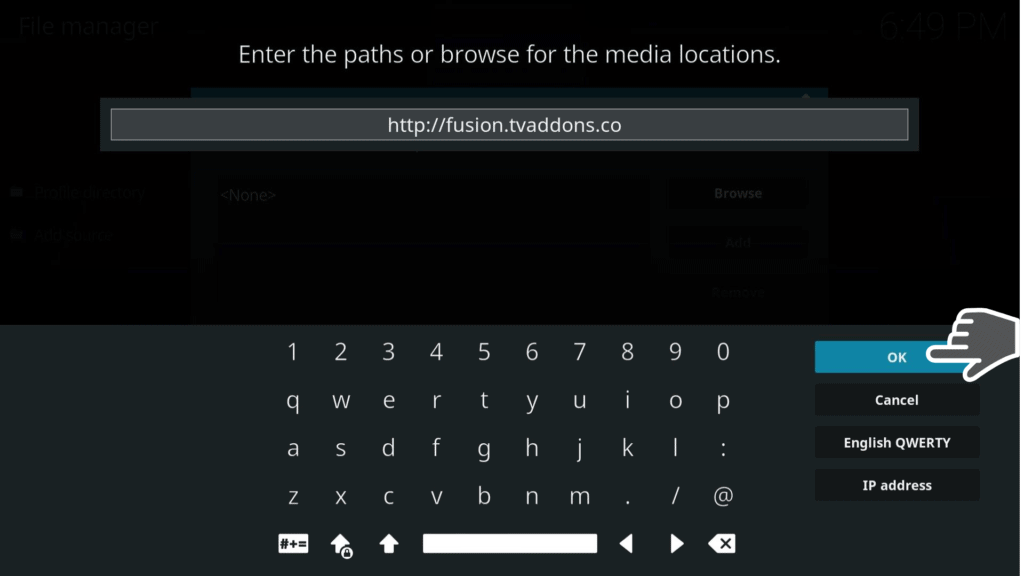
10. Type http://fusion.tvaddons.co using the on-screen keyboard. Click the OK button to continue.
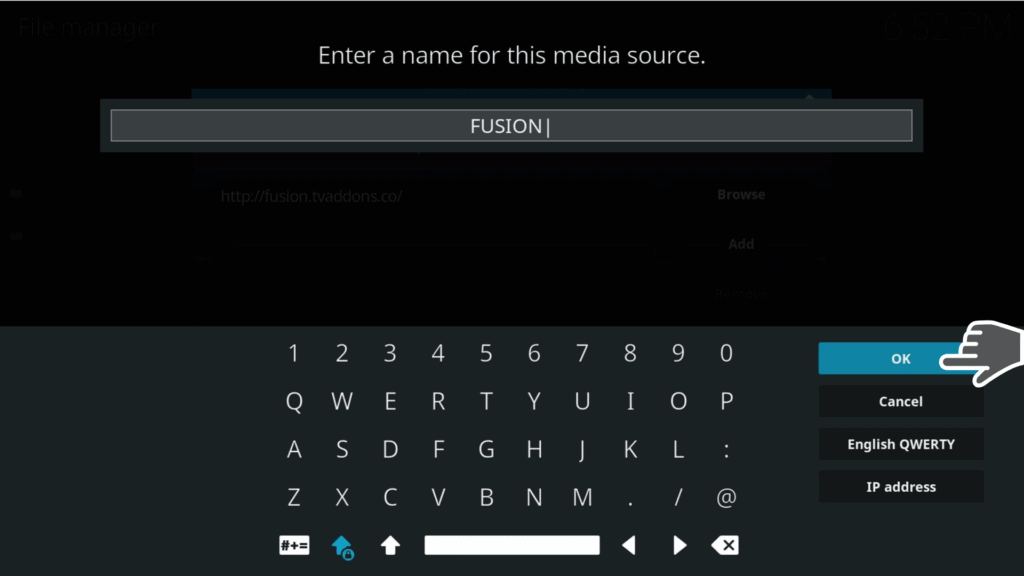
11. On the “Enter a name for this media source” enter a name as you prefer. Make sure to click OK.
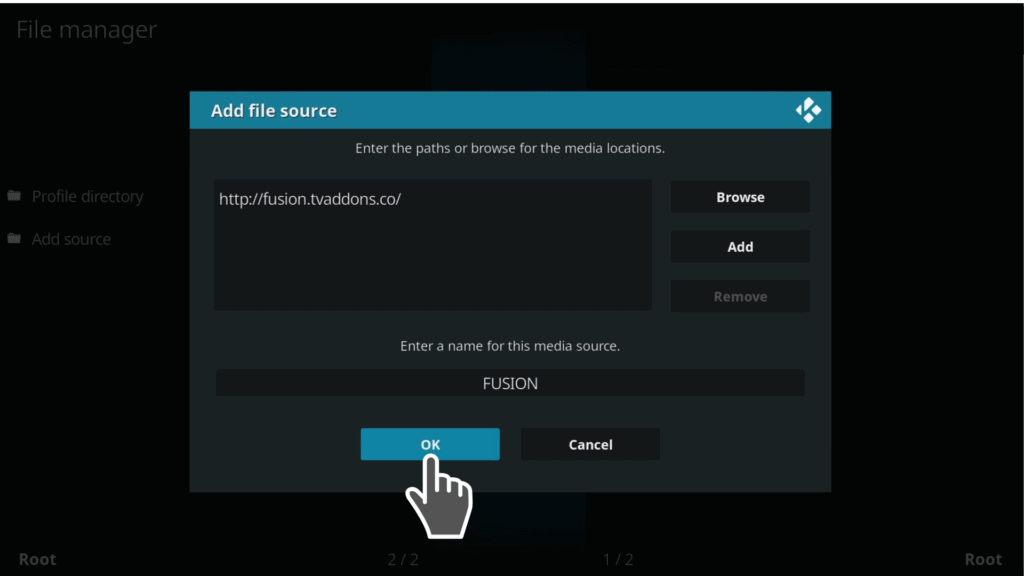
12. Click OK to proceed.
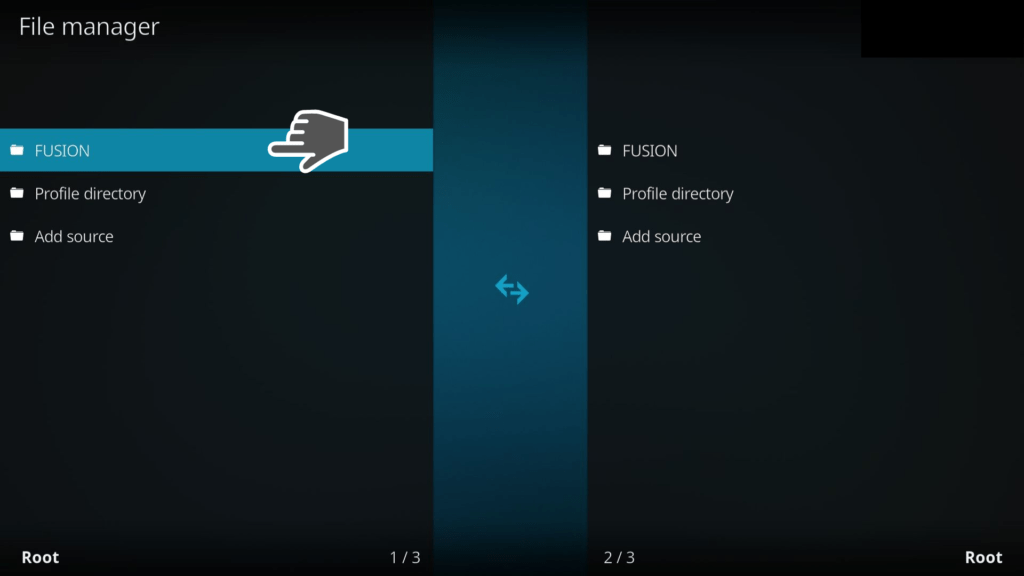
13. Use the back button on your remote to go back and notice that the FUSION file is added in file manager.
14. Go back to the home screen of Kodi by using again the back button on your remote controller.
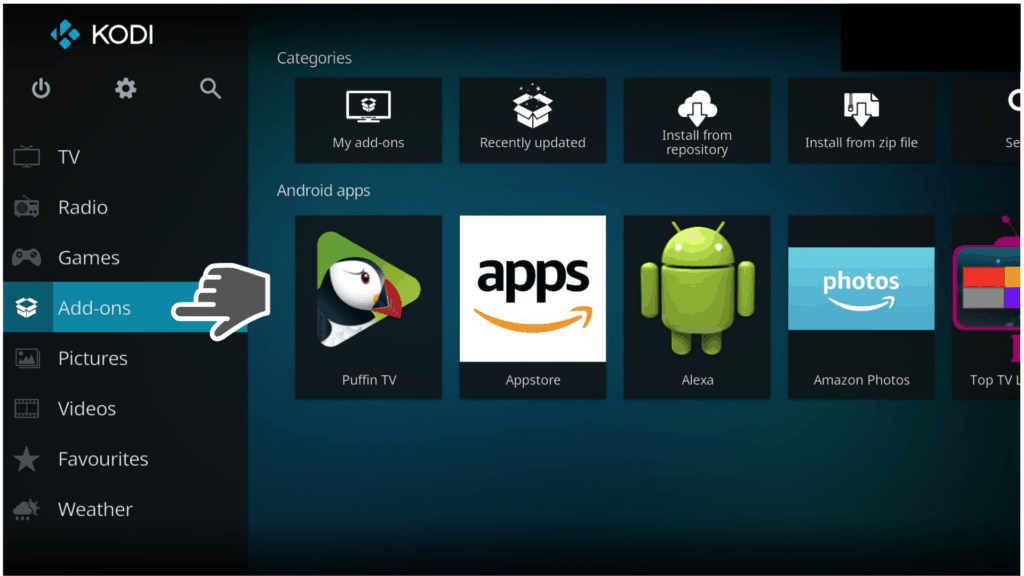
15. Click on “Add-ons.”
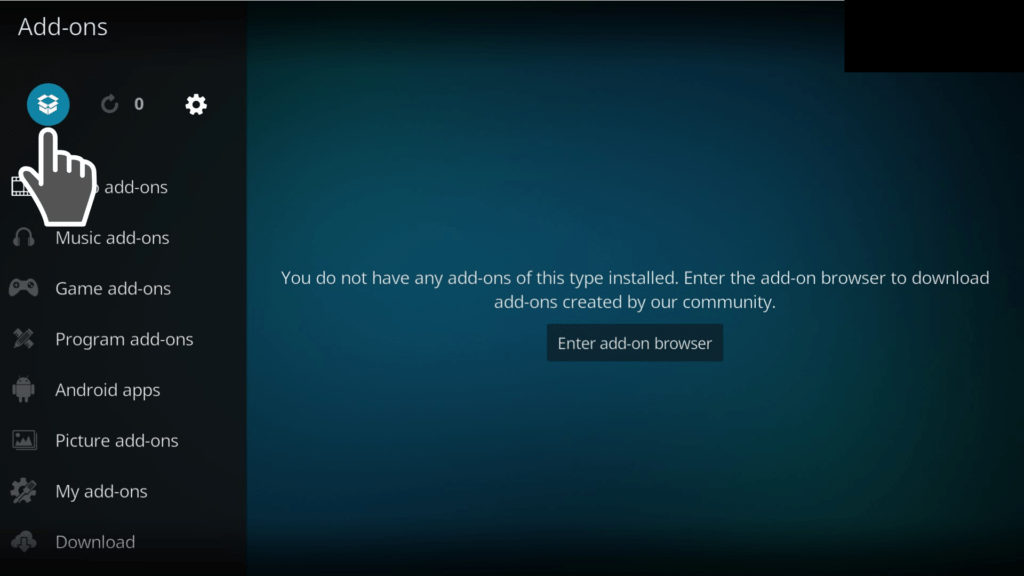
16. Click the box icon as shown in the photo below.
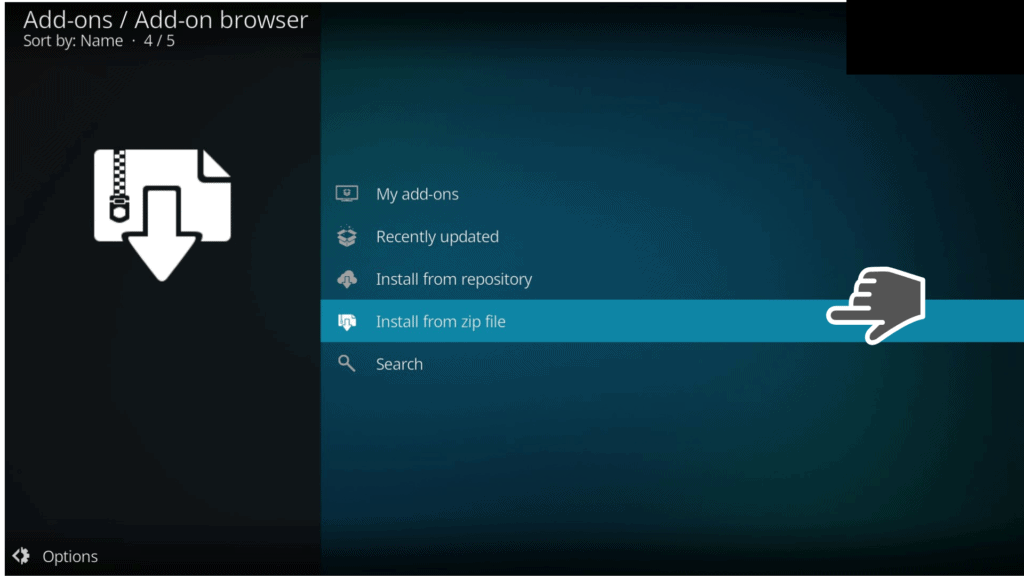
17. Go to Install from zip file.
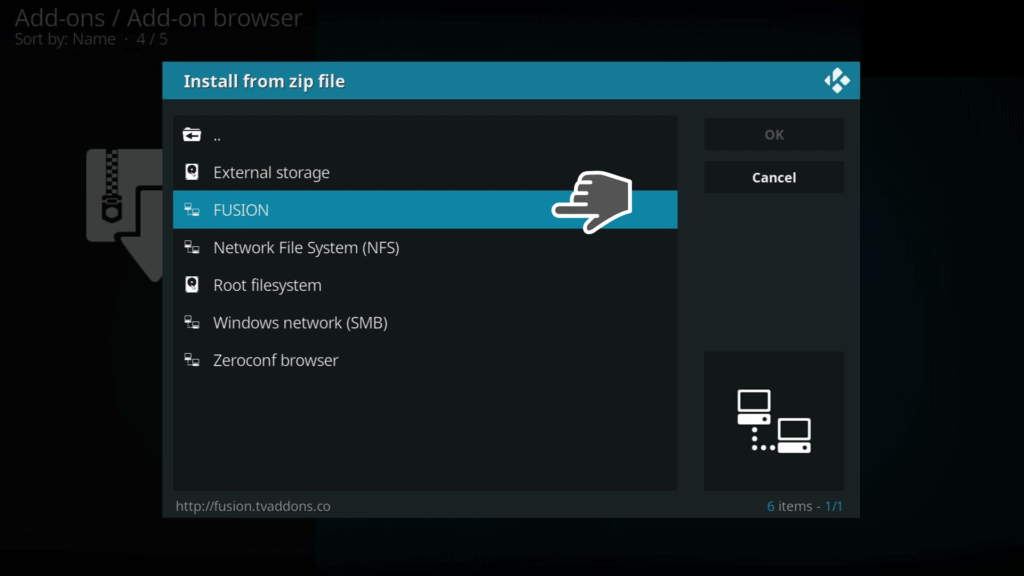
18. Choose the FUSION source from the listing.
19. Tap on the kodi-repos folder.
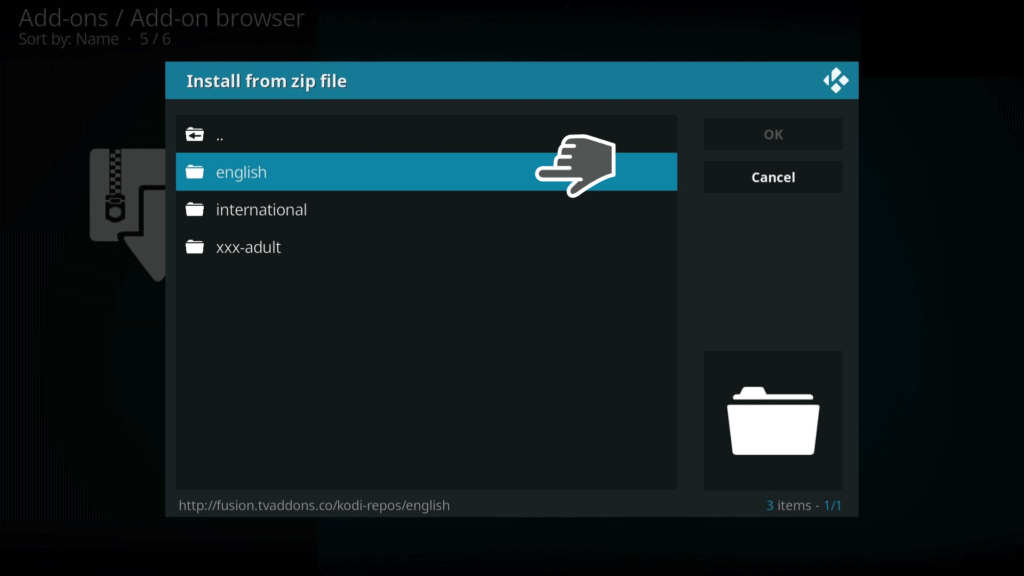
20. Choose “english” folder if you want to access a list of all the available repositories in the English language.
But, also feel free to choose “international” for more languages.
21. Click one of zip file of the Kodi repository Fusion you want to install and Fusion will do the rest for you.
Conclusion
So how to setup Kodi Fusion? Incorporating Fusion into your Kodi experience is a great way to access some awesome addons thanks to the numerous repositories available through Fusion. Fusion is definitely valuable for anyone that regularly installs Kodi addons.
Just make sure you use a VPN like IPVanish to protect yourself from things like geo-blocking identity and data theft while you’re enjoying Kodi and all its addons.
Do you have any comments or questions on how to setup the Fusion installer for Kodi Addons? Let us know in the comments section below.