In one of our previous tutorials we showed you, how to install VPN on your FireTV or Stick and stay anonymous with your internet activities. In this article, we will go further and demonstrate how to install a VPN on Mac OS.
Please keep in mind, that once you sign up for IPVanish VPN, it is available for almost every platform. There’s not the limit to use it only on your Fire TV or Stick, but you can use up to 10 other devices. The following step-by-step tutorial will guide you through the process to install a VPN on your Mac OS.
Attention: Read before you continue
Governments and ISPs across the world monitor their users online activities. If found streaming or browsing content on your Fire TV Stick, mobile or PC, you could get into serious trouble.
Currently, the following information is visible:
- Your IP:
- Your Country:
- Your City:
- Your ISP:
If this is your real information, you need to use a VPN to protect your identity.
We strongly recommend you to get a good VPN and hide your identity so that your online experience doesn’t take a bad turn.
We use IPVanish which is the fastest and most secure VPN in the industry. It is very easy to install on any device including Amazon Fire TV Stick. Also, it comes with a 30-day money-back guarantee. If you don’t like their service, you can always ask for a refund. IPVanish also runs a limited time offer where you can save 74% on your VPN and they allow you to use one account on unlimited devices.
This is a flash sale that can expire at any time!
Step-by-step Guide on How to Install VPN on Mac OS
Step 1: Sign up for an IPVanish Account. Depending on your needs, you can choose from the three options here. With our discount applied, the plan is only $5.20 a month – perfection option for Internet security. It even includes a 7-day-money-back guarantee.
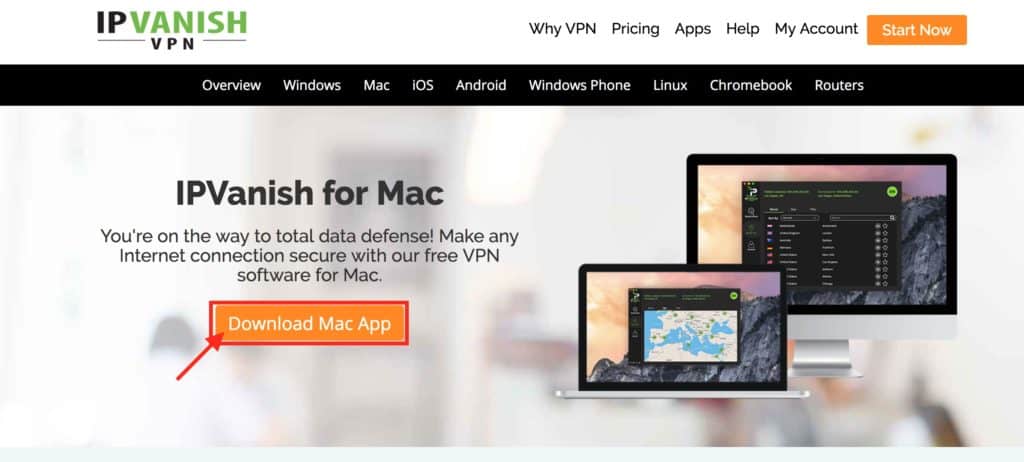
Step 2: After you successfully signed up for an account, click here https://www.ipvanish.com/vpn-setup/mac/ to go to the “IPVanish for Mac” download section and click the “Download Mac App” button. The “IPVanish Mac App” will be downloaded. You will need this app to install VPN on Mac OS.
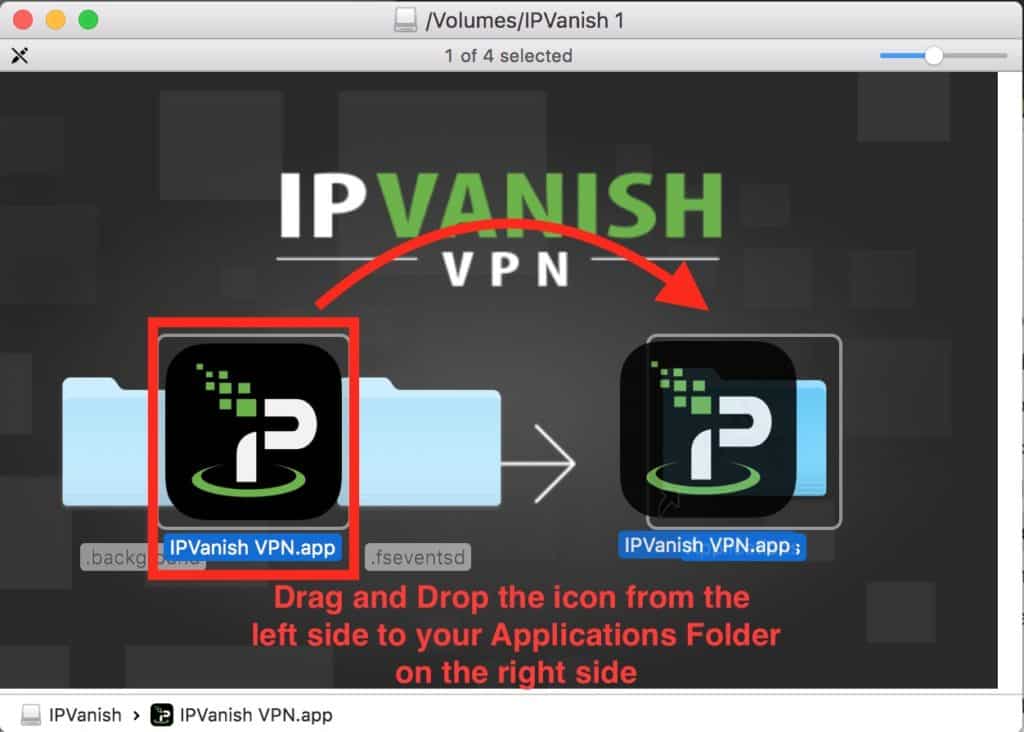
Step 3: After the download is complete, go to your “Downloads” folder and double click the IPVanish.dmg file. The installation dialog appears. Now “Drag&Drop” the IPVanish icon to the Applications section. IPVanish will be installed on your system.
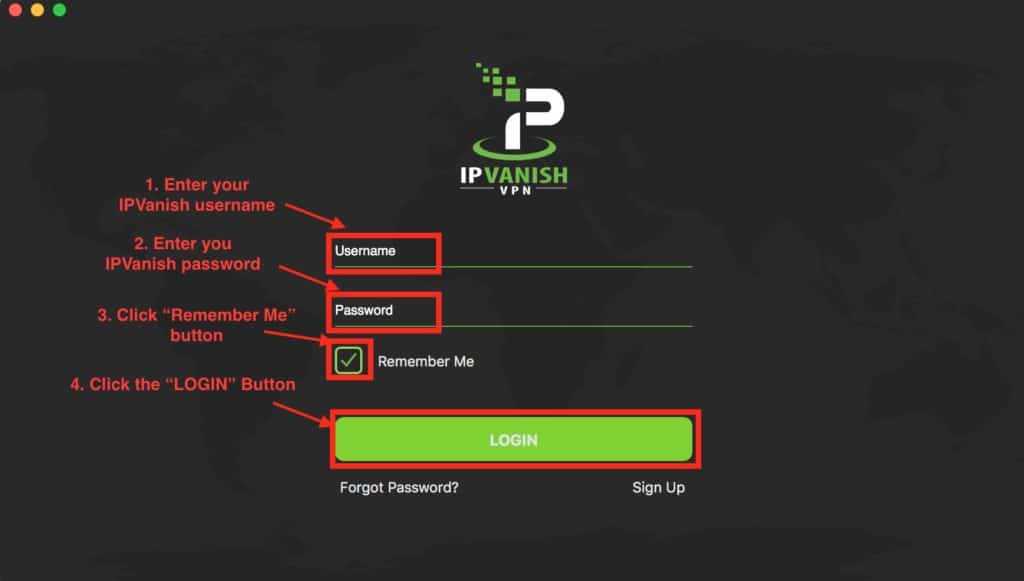
Step 4: Start IPVanish VPN by double clicking on the icon in your Applications folder. If you cannot find it, simply press CMD + Space (to access Spotlight search field) and enter “IPVanish.” Once it appears in suggestions, start the application by pressing ENTER. You now have to enter your IPVanish username and password and click on the Login button afterwards. Don’t forget to keep your account information safe and to never share your personal data.
Step 5: You’re now logged in! Initially, the app shows that you´re not currently connected to any VPN server. On the upper left corner, you can see your current IP address and location. This is your actual identity on the internet, your real actual location. But let’s change that together to make you untraceable!
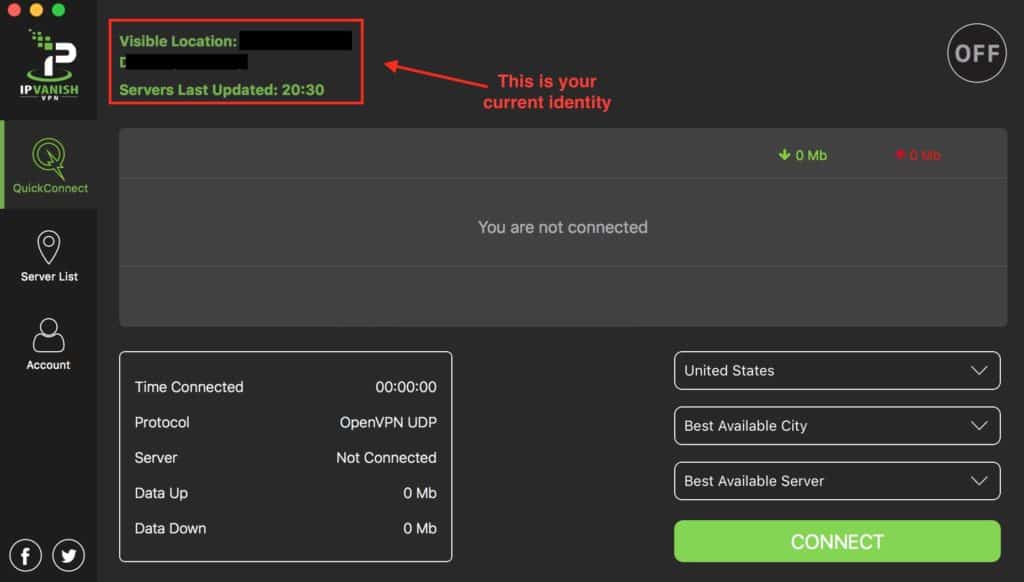
Step 6: Now you are ready to connect to a lot of VPN Servers and start surfing the Internet without leaving any traces. There are two ways to hide your online identity – letting the app select for you or selecting yourself.
For the first option, simply click on “CONNECT” on the bottom right corner without specifying any choice, if you want the app to choose the best city and server for you. Or you can also choose your preferred country and even a specific city and server.
The following screenshot shows that we connected to a server in Sofia, Bulgaria. You can see again in the upper left corner that the IP address of your visible location has changed. You are now surfing anonymously and every endpoint on the Internet will only see the IP address from Bulgaria instead of your real one. Congratulations, you’ve successfully learned how to install a VPN on Mac OS!

