
If you’re looking for really helpful information on how to install VPN on LibreELEC then you’ve come to the right place. Of course, LibreELEC is a well-known Kodi OS that operates on Linux, and you might be familiar with their tagline which goes, “Just Enough OS for Kodi.”
LibreELEC is particularly popular with Raspberry Pi device owners, which is a type of credit-card sized computer. It’s mostly used by computer building hobbyists, and LibreELEC runs rather smoothly on the latest Raspberry Pi 3 model. Seeing that LibreELEC operates according to the Linux OS, it’s pretty easy to put in an Open VPN Kodi add-on without any problems.
The purpose of the following guide is to show how to install VPN on LibreELEC while focusing on IPVanish specifically. That’s because IPVanish is arguably the safest, fastest and most reliable VPN that we’ve been using consistently over the years.
Trust us, we’ve tried a LOT of different VPNs over the years to see which one worked the best and IPVanish came on top each and every time, based on the features it comes with.

Attention: Read before you continue
Governments and ISPs across the world monitor their users online activities. If found streaming or browsing content on your Fire TV Stick, mobile or PC, you could get into serious trouble.
Currently, the following information is visible:
- Your IP:
- Your Country:
- Your City:
- Your ISP:
If this is your real information, you need to use a VPN to protect your identity.
We strongly recommend you to get a good VPN and hide your identity so that your online experience doesn’t take a bad turn.
We use IPVanish which is the fastest and most secure VPN in the industry. It is very easy to install on any device including Amazon Fire TV Stick. Also, it comes with a 30-day money-back guarantee. If you don’t like their service, you can always ask for a refund. IPVanish also runs a limited time offer where you can save 74% on your VPN and they allow you to use one account on unlimited devices.
This is a flash sale that can expire at any time!
First of all, IPVanish offers super-fast loading speeds which means you can download and stream content at lightning speeds. With other VPNs we found that they tend to reduce download and streaming speeds considerably due to the amount of processing power that they require. IPVanish is pretty much the only VPN that actually improves our loading speeds.
It’s also worth noting that a lot of VPN companies out there rely on rented servers that they get from third-party providers, whereas IPVanish actually owns its servers. That’s why they can confidently guarantee fast speeds and safety.
We also love the fact that IPVanish offers remote control operation that makes things so much easier. For instance, when running IPVanish on your Android device, you can control its settings from afar using the remote control function which is something that’s missing from other providers.
Not only that, but you can easily hook IPVanish with up to 10 different devices and enjoy ultimate privacy and safety whether you’re browsing through your tablet, PC, laptops or smartphone. It’s ideal for anyone that uses multiple streaming boxes in their home or place of work. That’s why we’re offering this tutorial on how to install VPN on LibreELEC.
Step-by-Step Guide on How to Install VPN on LibreELEC
- Start by registering an account on IPVanish.
- Next, launch Kodi on your device.
- Select “Settings” from the available Kodi options.
- Select “Systems Settings.”
- Highlight the “Add-ons” icons to activate Unknown Sources
- Move back to the System page
- Select “File Manager.”
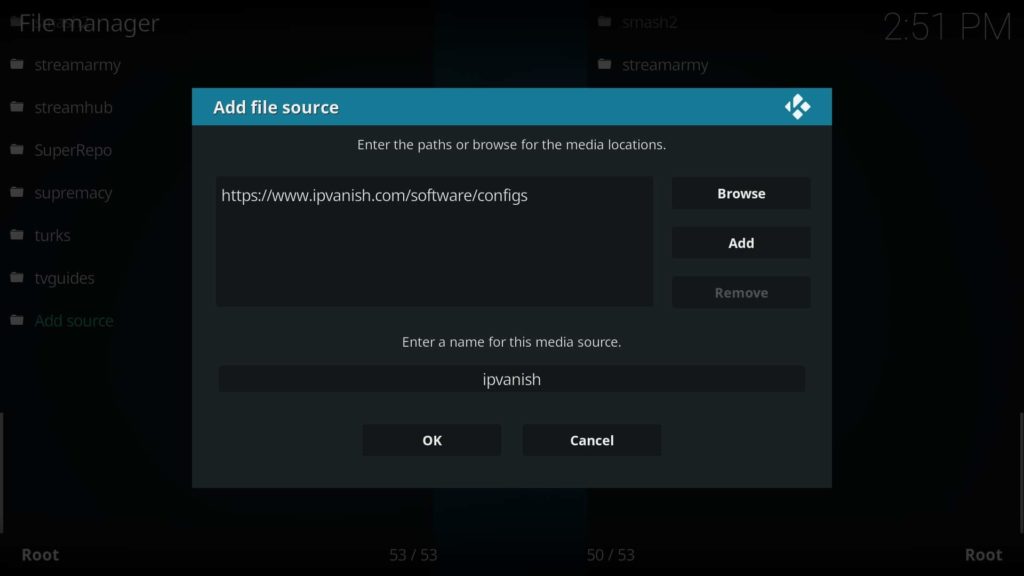
- Click “Add Source.”
- Select “None.”
- Type the following url exactly as it is listed here –https://www.websafetytips.com/libreelec and click OK
- Highlight the box located beneath the source you’ve typed in and then type in its name, i.e. “websafety” and select “OK.”
- Go back to the Kodi Home Screen
- Select “Add-ons.”
- Select the “open package” icon in order to install Kodi Add-on
- Click “Install” from the provided zip file.
- Choose the name you assigned to the source (i.e. websafety).
- Select the zomboided.plugins zip file.
- Wait for a few moments until you see a message saying the Zomboided Repository Add-on has been enabled.
- Select “Install.”
- Click “Zomboided Repository Add-on.”
- Select “Services.”
- Choose “VPN Manager for OpenVPN.”
- Click on the Install button.
- Give the VPN Manager a few moments before it shows a message saying “VPN Manager Add-on is enabled.”
- At this point, you should see a message asking you to set up a VPN provider.
- Select “OK” on the message and choose IPVanish as your provider once you get to the VPN configuration window.
- Input your unique IPVanish username and password before you click on the “VPN Connections” tab.
- Select “First VPN” so that it can auto-connect upon boot-up.
- At this stage, the VPN should automatically connect and show you a list of available servers.
- Select your preferred server to automatically connect to.
- Now that you’ve connected to your first server, you’ll be able to set up a second VPN connection.
Conclusion
Well, there you have it! Now you know how to install VPN on LibreELEC. As you can see, IPVanish is arguably the best VPN on the market because it offers better speed, it’s effective at providing safety and protection, plus it offers multiple reliable servers.
Did you have any issue with installing a VPN on LibreELEC? If yes, please let us know in the comments and we will try to get back to you immediately. Thank you!