As you may know, a VPN makes sure you enjoy safe online interactions and transactions. It does this by protecting your privacy and securing your connection.
It’s crucial to use a VPN when streaming content online so you can protect your activity from your ISP. This is because that could lead to data-throttling, geo-blocking restriction and all types of mood-killing online bureaucracy.
Attention: Read before you continue
Governments and ISPs across the world monitor their users online activities. If found streaming or browsing content on your Fire TV Stick, mobile or PC, you could get into serious trouble.
Currently, the following information is visible:
- Your IP:
- Your Country:
- Your City:
- Your ISP:
If this is your real information, you need to use a VPN to protect your identity.
We strongly recommend you to get a good VPN and hide your identity so that your online experience doesn’t take a bad turn.
We use IPVanish which is the fastest and most secure VPN in the industry. It is very easy to install on any device including Amazon Fire TV Stick. Also, it comes with a 30-day money-back guarantee. If you don’t like their service, you can always ask for a refund. IPVanish also runs a limited time offer where you can save 74% on your VPN and they allow you to use one account on unlimited devices.
This is a flash sale that can expire at any time!
Best IPVanish Secret Settings
The following list is a selection of IPVanish secret settings that will protect your privacy and safety online. They really work!
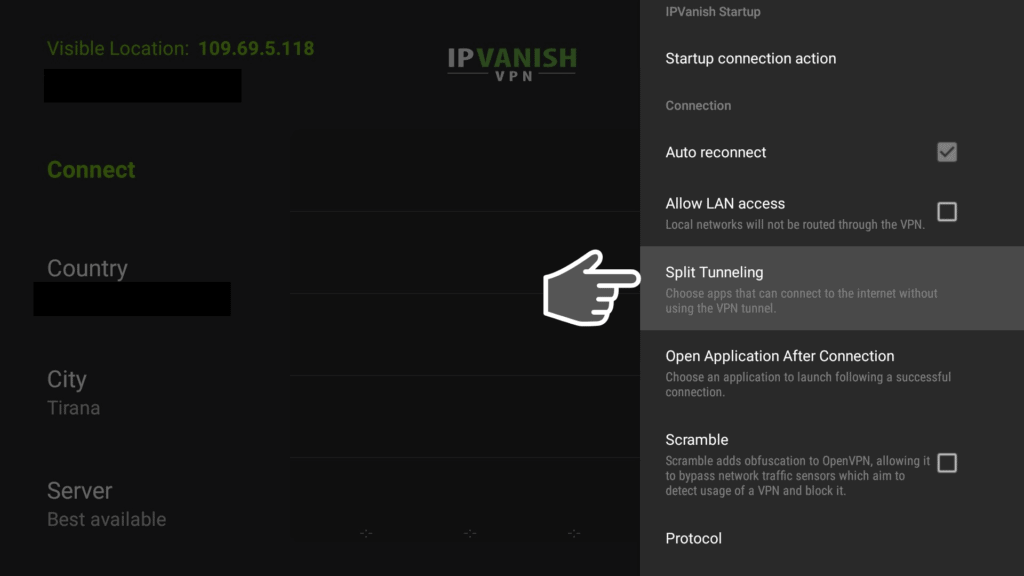
1. Split Tunneling
The Split Tunneling method allows you to control the flow of traffic on all the devices you use to connect to the Internet. You can use the Split Tunneling feature to choose apps that you’d like to route via your ISP as opposed to your VPN service.
This feature is primarily available for Android devices courtesy of IPVanish. It’s a great way to control your online security and privacy through the IPVanish VPN.
The following steps are what you need to apply to enable the Split Tunneling feature on your IPVanish app. Just make sure you’re using an Android device to get the most out of this feature.
3. Select Split Tunneling to see all of the apps that are currently in your device. Click on any app that you’d like to route through your ISP instead of your VPN. Click on the top-left arrow to go back to the IPVanish home screen.

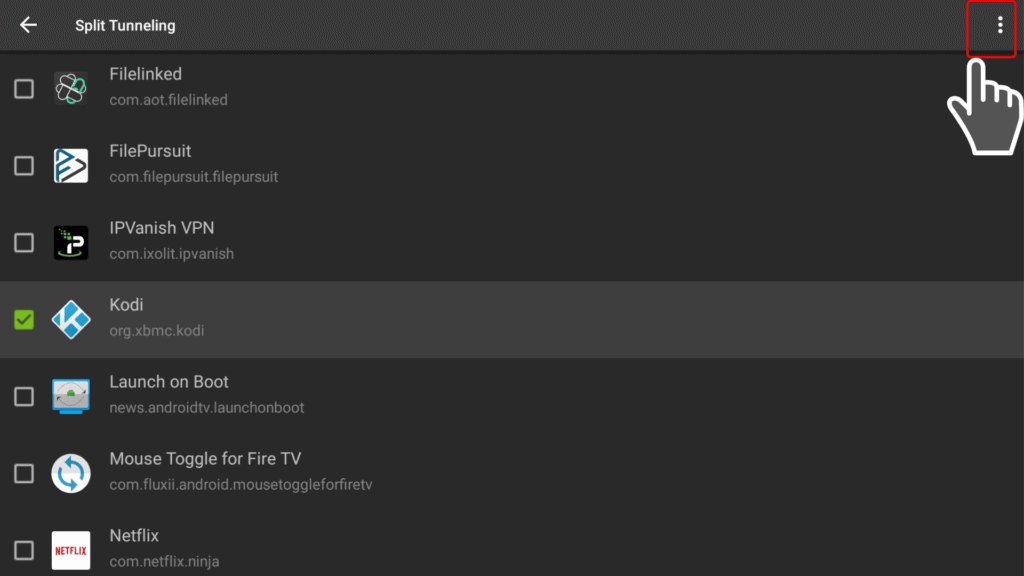
Check these articles to find out how to use Split Tunneling to stream Netflix and Amazon Prime Video.
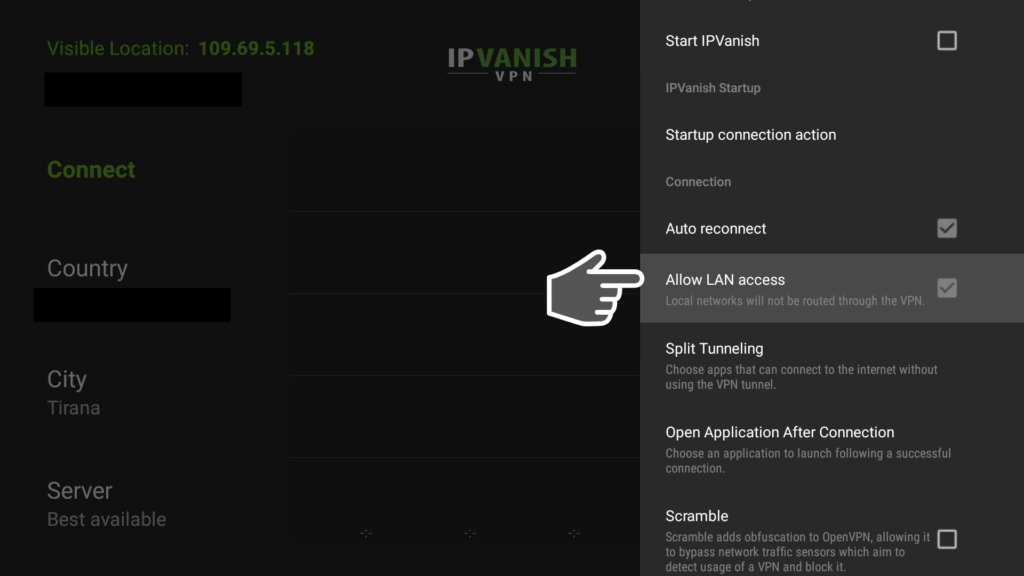
2. Allow Local LAN Access
Almost every VPN comes with a security feature. This allows you to block network connections whenever you connect to a network through your VPN. It helps to protect the user from cybercriminals who would use your device as a way into a corporate or home network that you’re a part of.
It works by isolating your PC or laptop from the general network so other users within it are not able to tunnel traffic through your device using the corporate website.
As you can see, this works similarly to Split Tunneling and it’s a great alternatively to companies that have a ban on Split Tunneling.
Consider “Allow local LAN access” as a middle ground between these two options. It prevents anyone from accessing the Internet unless their traffic goes through a designated tunnel. Users are still allowed to access LAN without encryption.
This obviously requires a very complex process where the VPN is able to identify the client’s local LAN in order to route traffic through it.
Otherwise, this functionality is not available through “allow split tunneling” because the user might be connecting through an Internet café, airport or home network with LAN printers.
Using “Allow local LAN access” enables automatic identification and authorization of the local LAN.
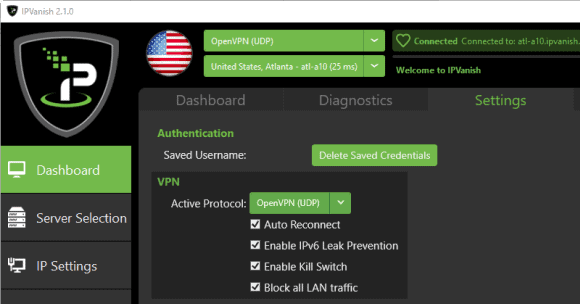
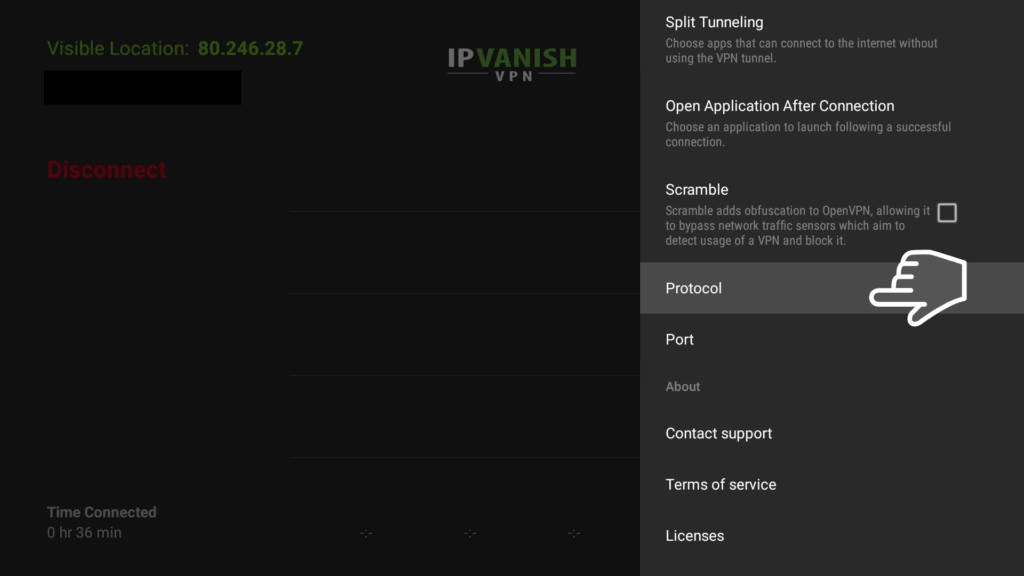
3. VPN Protocol
IPVanish gives you two options of OpenVPN (TCP and UDP). After so many researches, we found out the UDP Protocol performs faster than the TCP Protocol.
The following step-by-step process is going to show you how to select between the two protocols contained in the IPVanish app though one of the IPVanish secret settings.
1. Search for your IPVanish app and activate it. Go to the left-hand side of the app window and select “Settings”
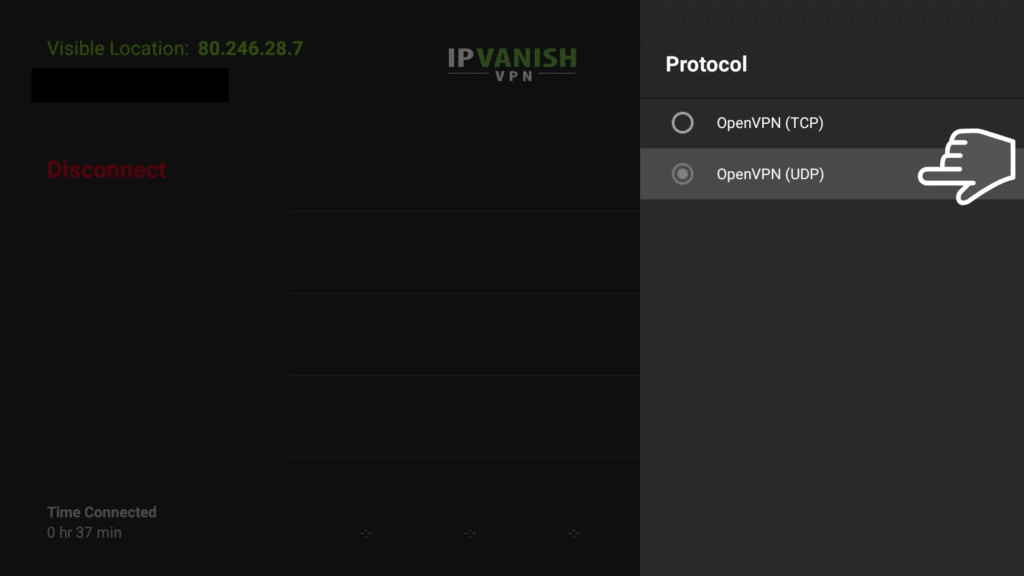
2. Once you’re in VPN settings, scroll down where you’ll find Protocol option. Click on it!
3. Choose a certain protocol while ensuring that you’re actually connected to a specific VPN server. Choose UDP Protocol.
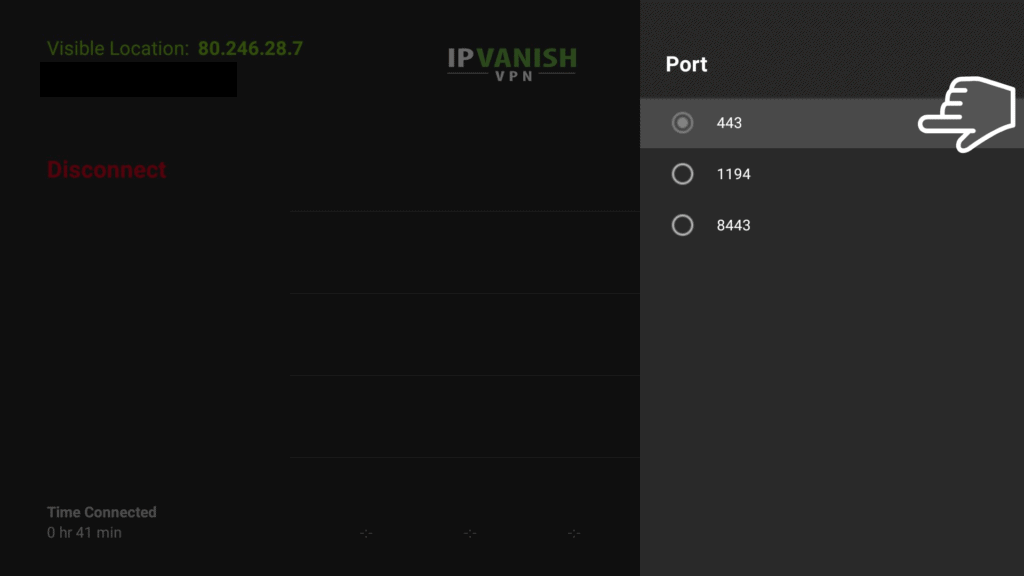
4. Go back and click on Port.
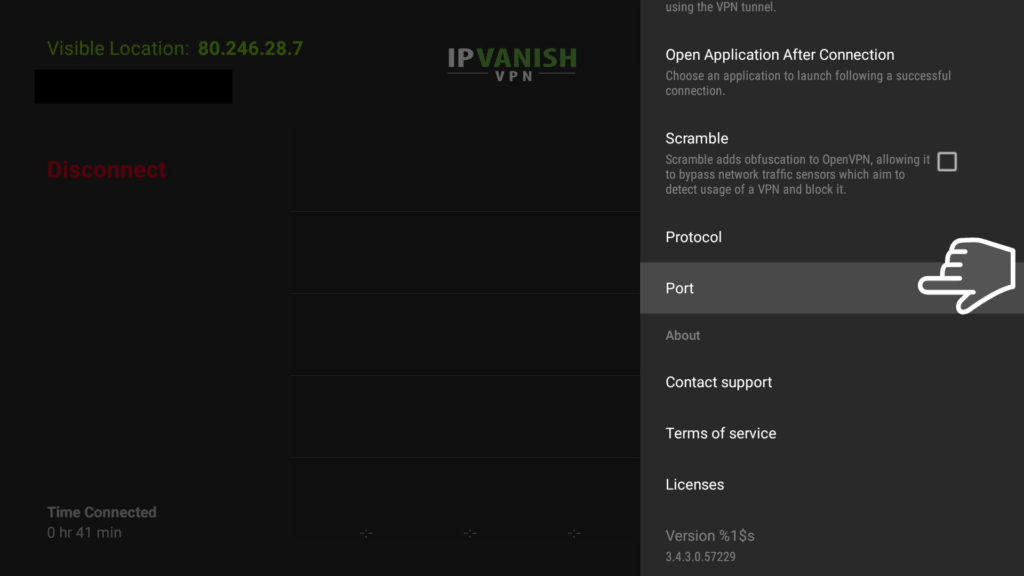
5. Choose Port 443 if you are experiencing slow VPN speed recently.
4. Lowest Latency Server
Most gamers prefer IPVanish VPN because it not only protects you from common cybersecurity threats, but it also helps you enjoy a smooth, buffer-free experience with fast-loading pages.
Another benefit of using IPVanish is that it gives you access to all of your favorite games and you don’t have to worry about DDoS attacks or geo-location restrictions that mess with your gaming experience.
Plus, you can enjoy all the games you like while protecting your data and your identity too through IPVanish secret settings like this one.
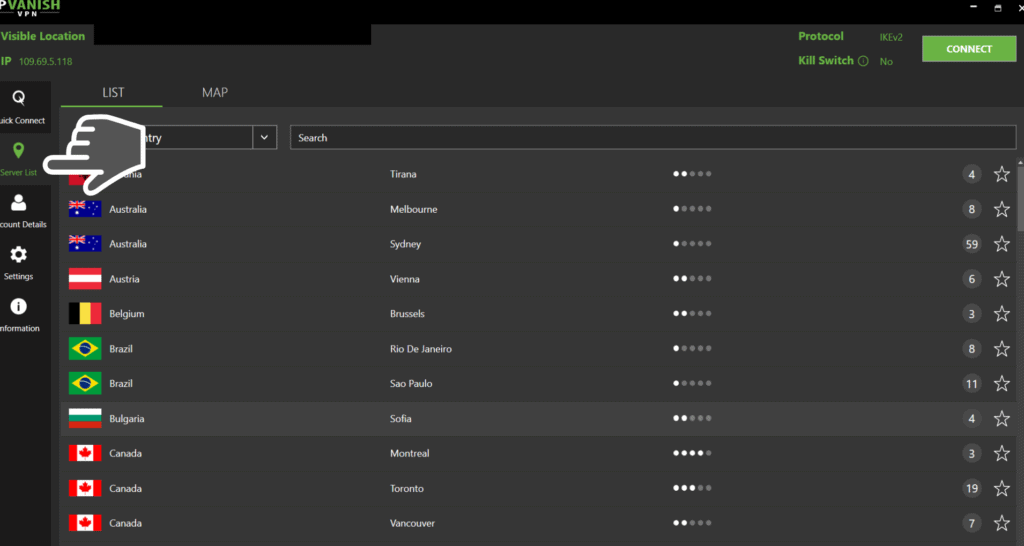
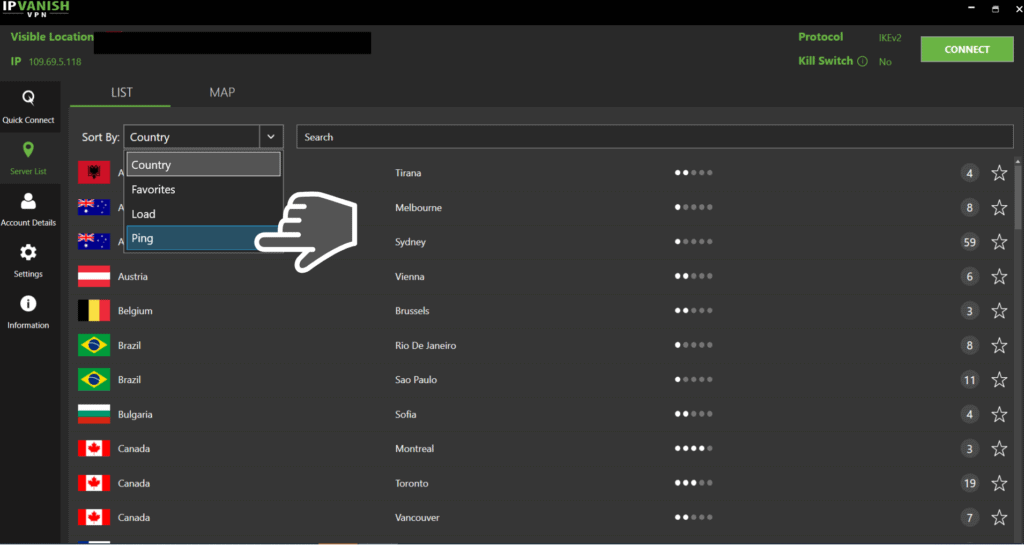
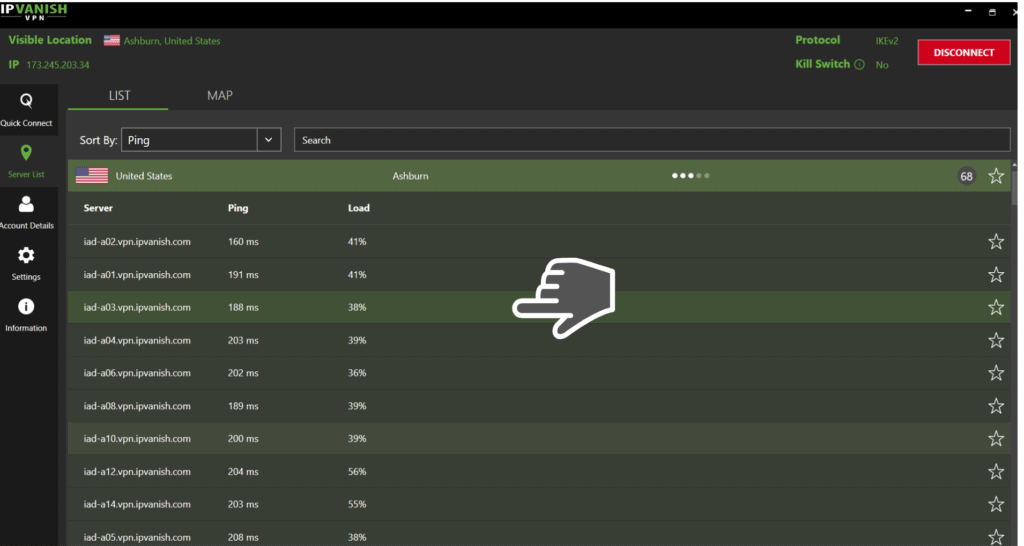
Here’s how to choose the IPVanish server with the lowest ping on your Windows or iOS operating system.

Let us know how it goes with these IPVanish secret settings in the comments below. We love hearing from you!