
FileLinked just released a new feature – Categories. If you are a code creator, you can now categorize all your files for better organization. Above all, this was one of the most requested features from the community. Now, this articles will show you a step by step tutorial on how to create FileLinked categories.
We assume that you already have a FileLinked account and know how to link your files in the dashboard. Otherwise, we recommend the blogpost: 8 Facts you need to know about FileLinked for a better understanding.
So, let’s get started with the tutorial!
Attention: Read before you continue
Governments and ISPs across the world monitor their users online activities. If found streaming or browsing content on your Fire TV Stick, mobile or PC, you could get into serious trouble.
Currently, the following information is visible:
- Your IP:
- Your Country:
- Your City:
- Your ISP:
If this is your real information, you need to use a VPN to protect your identity.
We strongly recommend you to get a good VPN and hide your identity so that your online experience doesn’t take a bad turn.
We use IPVanish which is the fastest and most secure VPN in the industry. It is very easy to install on any device including Amazon Fire TV Stick. Also, it comes with a 30-day money-back guarantee. If you don’t like their service, you can always ask for a refund. IPVanish also runs a limited time offer where you can save 74% on your VPN and they allow you to use one account on unlimited devices.
This is a flash sale that can expire at any time!
1. Login to the Dashboard
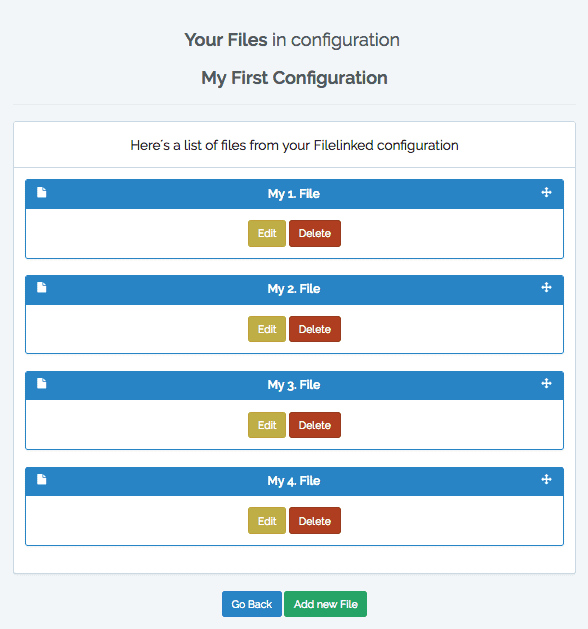
Firstly, login to your FileLinked Dashboard here and navigate to your configuration where categories should be added. Before you create FileLinked categories, your configuration will look similar to our screenshot below (Of course, with different file names). As can be seen, there is no order for the files and they’re not currently categorized.
2. Add and create FileLinked categories
In order to add new categories to your files, click the button “Add New File.” Don’t be alarmed – to create FileLinked categories, you follow the same procedure as adding files. The only difference is that you don’t need to provide a “Download URL.”
Now FileLinked will redirect you to a new form and will ask if your new entry is a category or a file. Just click on the slider to switch from “File” to “Category“.
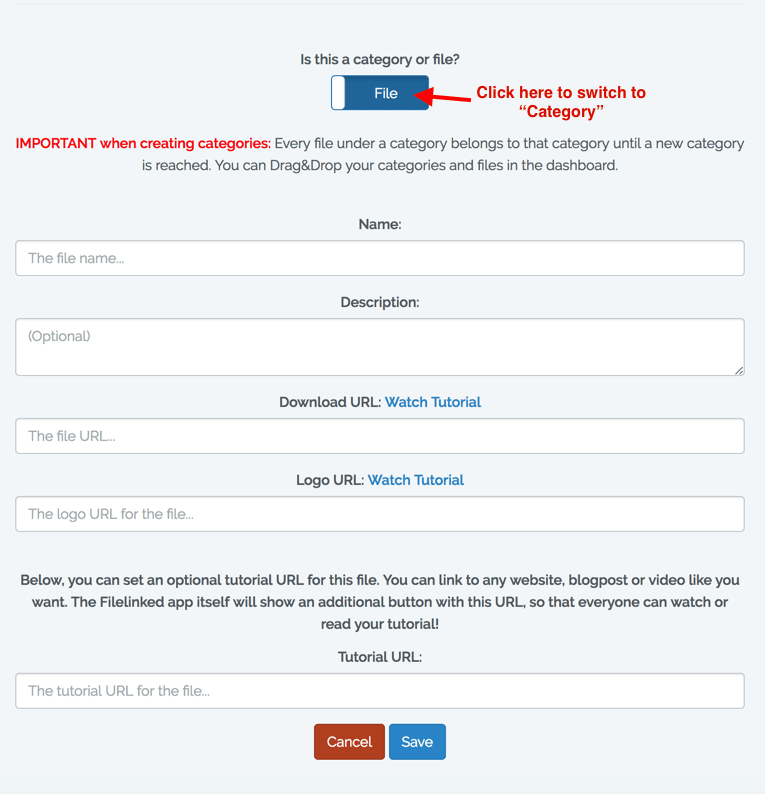
You can configure your “Category” as you wish and provide the following information:
- Name (mandatory) -> The name of your category
- Description (optional) -> A small description for this category
- Logo URL (optional) -> A logo to your category
- Tutorial URL (optional) -> An external URL can be linked
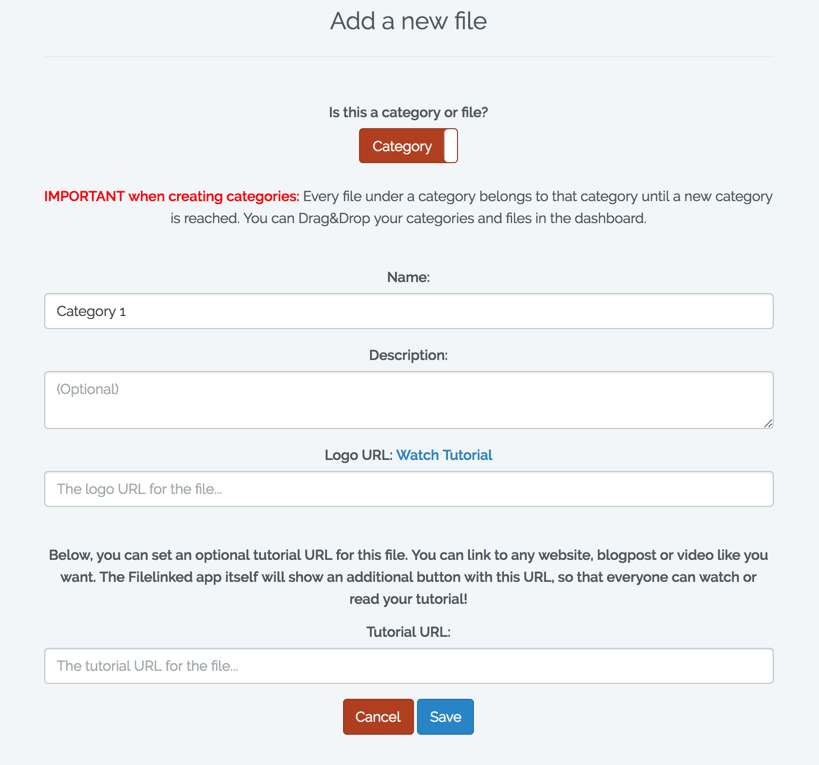
To conclude, click the “Save” button to add the category to your configuration. FileLinked will redirect you to the configurations overview page. For example, we have further added a second category named “Category 2.” As shown below, categories are shown in red and files are shown in blue. That’s it! This is how to create FileLinked categories.
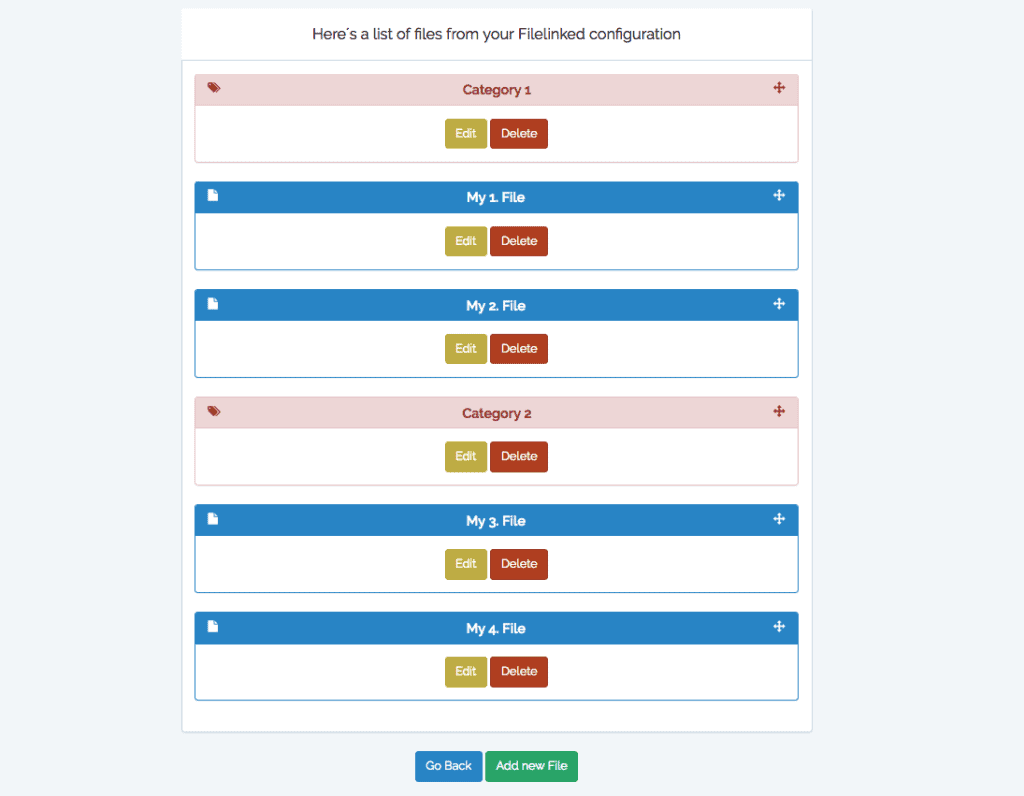
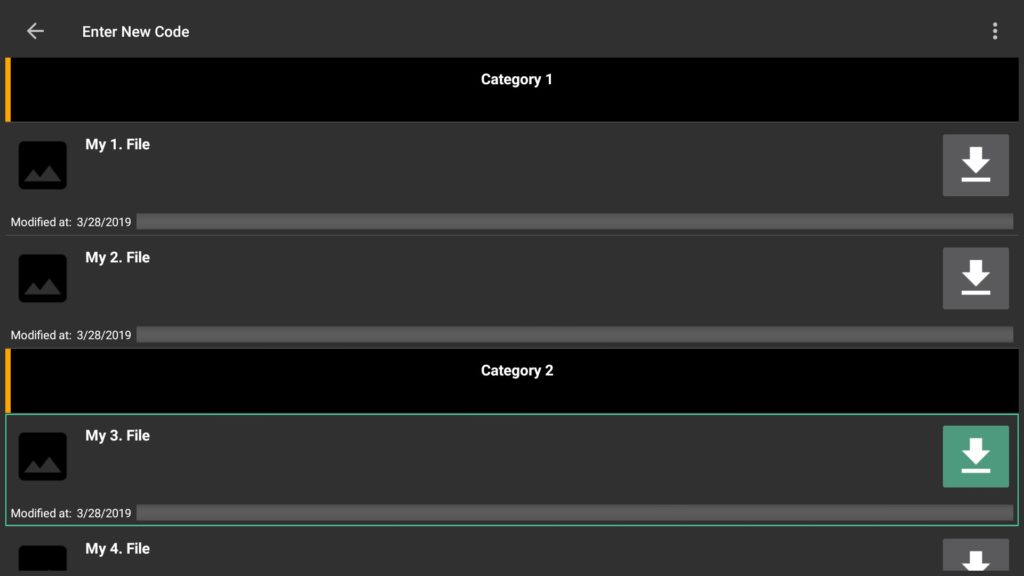
You can Drag & Drop your categories as you prefer. The only point to keep in mind is that every file listed under a specific category belongs to that category until the next category appears. For instance, when you look at the screenshot above it means:
- “My 1. File” and “My 2. File” belong to “Category 1“
- “My 3. File” and “My 4. File” belong to “Category 2
3. Test your categories in the FileLinked App
Afterwards, when you finish successfully setting up your FileLinked categories, see them in action in the FileLinked app itself. Just enter your FileLinked code to see your new categories applied. Below, you can see how our example from this tutorial appears in FileLinked.
We hope you enjoyed our tutorial on how to create FileLinked categories. Leave a comment below for any suggestions and feedback! We love hearing from you.