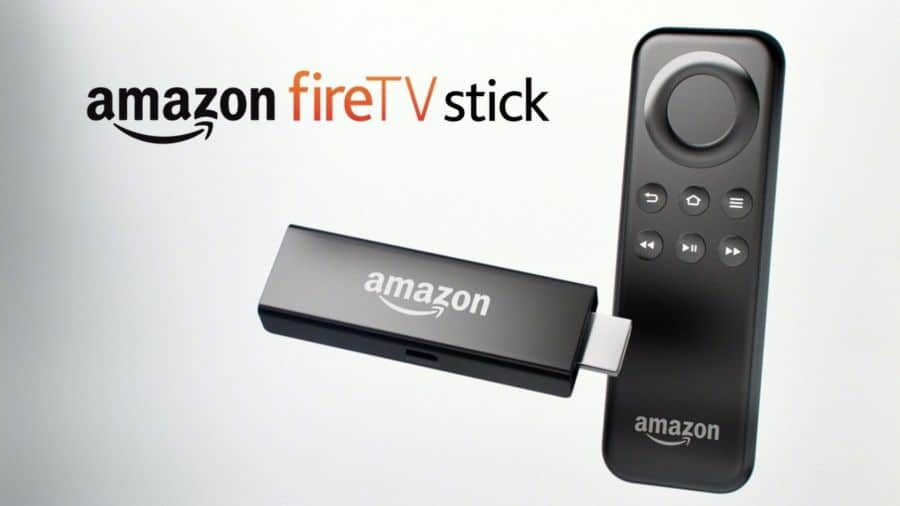
The Fire TV Stick device is the cheapest offering from Amazon’s extensive range of products. You can use your Fire TV Stick to catch all your favorite TV shows and movies, and even stream content from Netflix, Hulu and HBO Now.
This article is a step-by-step guide on how to set up and use your Amazon Fire TV Stick. You’ll learn how to get the most out of your Fire TV Stick as well as helpful solutions to common issues. At a price point of just $40, this device offers great value for money for beginners.
What Comes with the Box?
Here’s what you can expect to come with your Amazon Fire TV Stick device:
- 1 Amazon Fire TV Stick device
- An HDMI Extender cable
- 2x AAA Amazon Basics remote control batteries
- Fire Stick Power Adapter
- Alexa Voice Control Remote Control
We were particularly impressed with the thoughtful inclusion of the HDMI extender cable, which comes in handy for the wide Fire TV Stick dongle. The Fire TV Stick will probably block other ports on its own, but the extender cable helps to prevent any obstruction.
Attention: Read before you continue
Governments and ISPs across the world monitor their users online activities. If found streaming or browsing content on your Fire TV Stick, mobile or PC, you could get into serious trouble.
Currently, the following information is visible:
- Your IP:
- Your Country:
- Your City:
- Your ISP:
If this is your real information, you need to use a VPN to protect your identity.
We strongly recommend you to get a good VPN and hide your identity so that your online experience doesn’t take a bad turn.
We use IPVanish which is the fastest and most secure VPN in the industry. It is very easy to install on any device including Amazon Fire TV Stick. Also, it comes with a 30-day money-back guarantee. If you don’t like their service, you can always ask for a refund. IPVanish also runs a limited time offer where you can save 74% on your VPN and they allow you to use one account on unlimited devices.
This is a flash sale that can expire at any time!
What Will You Need?
- High Definition Screen – The Fire TV Stick is a versatile device that’s compatible with any screen enabled device that has an HDMI port. This includes TV sets and certain computer monitors. Full HD TV sets with 1080p screen resolution usually work best with the Amazon Fire TV Stick, and it’s worth noting that this device doesn’t come with 4K support.
- Fast Wireless Connection – To set up and use your Amazon Fire TV Stick (and successfully stream 1080p resolution video), you’ll need to have a fast Internet connection that runs at 8 Mbps. If you’re streaming 720p HD video then a speed of 4 Mbps is good, while a speed of 2 Mbps is suitable for streaming 480p SD video. Keep in mind that the Fire TV Stick doesn’t come with an Ethernet port so you must have Wi-Fi.
- Amazon Account – This is a no-brainer since this is an Amazon device. But if you don’t have an Amazon account you’ll need to set one up as soon as you receive your device so you can launch it. In order to access all the content available with this device, you have to use it with Amazon Prime.
How to Set Up the Amazon Fire TV Stick
Now that you know what you need in order to set up and use your Amazon Fire TV Stick, it’s time you get to the nitty gritties of the process. The first thing you need to do is connect the device to a power adapter and your TV set or relevant device. Turn on your Amazon Fire TV Stick and use the TV remote to find the proper HDMI port.
1. Pair the Remote
First, you’ll need to pair your Fire TV Stick with the Alexa Remote.
Here’s how:
- Check the back of the Alexa Remote to make sure the batteries have been inserted. The batteries should face the same direction in order to work correctly.
- Position the remote so that it’s within 5 meters or closer to the Fire TV Stick device.
- Long press the Home button for at least 10 seconds to give the remote enough time to find the Fire TV Stick device.
2. Choose the Preferred Language
Once you get to the Home Page, you can select your preferred language.
Use the navigation trackpad to scroll up or down until you find your preferred language highlighted in yellow. Click “Select” to pick the language of your choice.
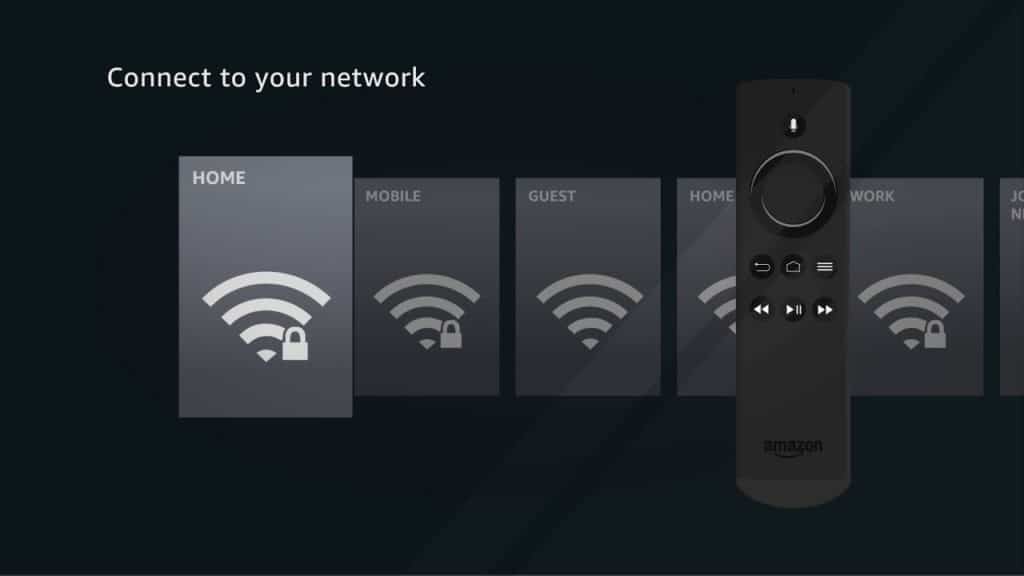
3. Connect to Wi-Fi

Next, you need to connect to your Wi-Fi network.
Use the navigation trackpad to scroll left or right until you get to your preferred network. Hover over your preferred network until it’s highlighted in grey. Click “Select” to pick it.
4. Register the Fire TV Stick Device
Next, you’ll be required to register your Fire TV Stick through your Amazon account. If you already have an account, you’ll find it highlighted in grey. Click on “Select” and input your credentials before pressing Play.
The Fire TV Stick should automatically register your account. This will take you to a confirmation screen with your account details. Double check everything to make sure your credentials are correct before you click on “Select.”
5. Save Your Wi-Fi Password
At this point, a pop-up screen should appear to request that you save the WiFi password you used for your Fire TV Stick. This will make it easier for you to connect all of your Amazon devices to that same WiFi network.
As convenient as it sounds, selecting “Yes” will make you vulnerable to cyber-attacks. For the best results, click “No.”
6. Set Up Parental Control
The following screen will help you set parental controls. This includes setting up a 5-digit PIN password. Anyone who wants to access content that’s rated Teen or above will have to provide this PIN password.
If you don’t feel like setting up parental controls, click “Select No Parental Controls” and jump to the following option. Should you wish to limit your kids’ access to your Fire TV Stick, click on “Enable Parental Controls.”
The device will request a new PIN which might be difficult to set up due to the weird placement of the trackpad wheel. To simplify the process, go to your Alexa remote and click on the three-line Options button. From there, choose your PIN and confirm.
Click “OK” to finalize Parental Controls Enabled.
7. Watch the Introduction Video
The device will now show you an instructional video on how to use the voice commands of the Alexa Remote in order to control your Fire TV Stick.
8. Monitor Data Consumption
The following screen will let you know how much data is required by your Fire TV Stick device. You’ll want to pay attention to this info if your data plan is limited and click on “Enable Data Monitoring.”
If you’re using an unlimited data plan, then you can just click on the “Set Up Later” option. Next, select your preferred video quality and choose how much data your device can use per month. Next, choose the date at which your Internet Service Provider (ISP) typically calculates your monthly data use.
That’s it for this section. You have now officially completed your data consumption settings. Your Fire TV Stick will alert you whenever you reach your monthly data limit.
9. Enjoy Your Amazon Fire TV Stick
At this point, you should be able to use your Fire TV Stick. The device will automatically display the Home Screen where you’ll be able to enjoy all that your Fire TV Stick has to offer.
10. Connect the Fire TV Remote App
We know you’re probably excited to start using your Fire TV Stick already, but there’s one more thing you need to do first. Download the Fire TV Stick Remote app and pair it with your device.
The Alexa Remote is fine but it doesn’t work as well as the Amazon Fire TV Remote app. The best part is that this app is compatible with all Android and iOS devices. Once you finish downloading the device, install it onto your device and enjoy!
Remember you can also install multiple apps at the same time on your Fire TV Stick!
How to Use the Fire TV Stick

Now that you’ve learned how to set up and use your Amazon Fire TV Stick device, it’s time to start enjoying all of its entertainment options. First up is Amazon Prime, a platform which has thousands of TV shows and movies for you to enjoy.
1. How to Navigate the Home Screen
You may have a hard time navigating the home screen and menu at first but with regular practice, it’ll only get easier. It usually takes a couple of days for most people to get the hang of it.
One way to familiarize yourself with your Amazon Firestick device is to get used to how the different buttons look. For example, anything that’s highlighted in Yellow or Orange is where the cursor is. That means if you click “Play/ Pause” the device will automatically take action on the item that’s highlighted in Yellow and/or Orange.
The navigational trackpad buttons are your key to viewing all the actionable items.
2. How to Navigate the Movie or TV Show Menu
First, you need to see the movie screen. Once there, you should be able to see all the relevant information, including the film’s IMDb rating, MPAA rating, its release date, length, a list of the actors and director/s, available subtitle and audio languages, as well as a short synopsis.
If you want to watch a TV episode, click on “Watch Now with Prime” to start watching. The device will take you straight to the first episode of the first season. If you’re continuing a show that you watched before, your Firestick will automatically resume from where you left off.
To choose a specific episode, go to “Seasons and Episodes.” Here you’ll be able to see all of the series and episodes available. If you click on an episode, you’ll be able to see a short synopsis and an option to add it to your watchlist.
Conclusion
There you have it! That’s how you set up and use your Amazon Fire TV Stick! To ensure safety and privacy while using your Amazon Firestick, be sure to install a virtual private network (VPN). IPVanish is a great option because it will completely hide your streaming and downloading activity while protecting your identity.
Let us know in the comments section below if we’ve helped you to learn how to set up and use your Amazon Fire TV Stick.


